Tkinter Radio Button Color Customization Tutorial
In this tutorial, you’ll learn how to customize the colors of radio buttons in Tkinter.
This includes changing indicator colors, adjusting background colors, modifying colors for different states (normal, active, disabled), and applying interactive hover effects.
Change Indicator (Circle) Color
You can change the radio button indicator color using the foreground property:
import tkinter as tk
root = tk.Tk()
root.title("Radio Button Customization")
plans = ["Plan A", "Plan B", "Plan C"]
selected_plan = tk.StringVar(value=plans[0])
def create_radio_buttons():
    for plan in plans:
        radio_button = tk.Radiobutton(root, text=plan, variable=selected_plan, value=plan, foreground="blue")
        radio_button.pack(anchor=tk.W)
create_radio_buttons()
root.mainloop()
Output:
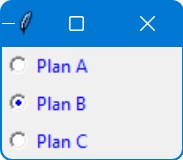
The foreground property is set to "blue", changing the color of the text for each radio button to blue.
Customize Indicator Background Color
You can set the indicator (circle) background color of radio button using the selectcolor property:
import tkinter as tk
root = tk.Tk()
root.title("Adjusting Radio Button Select/Unselect Colors")
options = ["Option 1", "Option 2", "Option 3"]
selected_option = tk.StringVar(value=options[0])
def create_radio_buttons():
    for option in options:
        radio_button = tk.Radiobutton(root, text=option, variable=selected_option, value=option, selectcolor="green")
        radio_button.pack(anchor=tk.W)
create_radio_buttons()
root.mainloop()
Output:
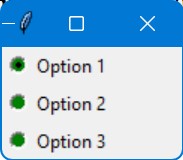
Here the indicator background is set to "green".
Customize Active and Disabled Colors
You can use the activeforeground property to set the active state color of a radio button.
For disabled state color, you can use the disabledforeground property
import tkinter as tk
root = tk.Tk()
root.title("Radio Button State Color Customization")
options = ["Option 1", "Option 2", "Option 3"]
selected_option = tk.StringVar(value=options[0])
def create_radio_buttons():
    for option in options:
        radio_button = tk.Radiobutton(root, text=option, variable=selected_option, value=option)
        radio_button.pack(anchor=tk.W)
        radio_button.config(activeforeground="green", disabledforeground="red")
create_radio_buttons()
root.children["!radiobutton2"].config(state=tk.DISABLED)
root.mainloop()
Output:
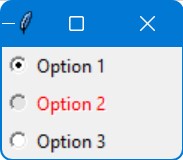
The activeforeground property is set to green, which changes the text color of the radio button when the user clicks it.
The disabledforeground property is set to red which indicates that “Option 2” is not selectable.
Apply Color Changes on Mouseover
You can change the color of a radio button when the mouse hovers over it by binding <Enter> and <Leave> events to functions that change the color.
import tkinter as tk
root = tk.Tk()
root.title("Hover Effects on Radio Buttons")
options = ["Option A", "Option B", "Option C"]
selected_option = tk.StringVar(value=options[0])
def on_enter(event):
    event.widget.config(background="yellow")
def on_leave(event):
    event.widget.config(background="lightgray")
def create_radio_buttons():
    for option in options:
        radio_button = tk.Radiobutton(root, text=option, variable=selected_option, value=option, background="lightgray")
        radio_button.pack(anchor=tk.W)

        radio_button.bind("<Enter>", on_enter)
        radio_button.bind("<Leave>", on_leave)
create_radio_buttons()
root.mainloop()
Output:
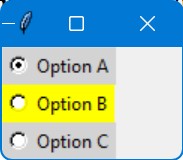
In this code, we bind the <Enter> and <Leave> mouse events to each radio button.
When the mouse pointer enters the area of a radio button, the on_enter function is triggered and it changes the background color to yellow.
When the mouse leaves the area, the on_leave function is called and it reverts the background color to light gray.
Mokhtar is the founder of LikeGeeks.com. He is a seasoned technologist and accomplished author, with expertise in Linux system administration and Python development. Since 2010, Mokhtar has built an impressive career, transitioning from system administration to Python development in 2015. His work spans large corporations to freelance clients around the globe. Alongside his technical work, Mokhtar has authored some insightful books in his field. Known for his innovative solutions, meticulous attention to detail, and high-quality work, Mokhtar continually seeks new challenges within the dynamic field of technology.