Align Tkinter Radio Buttons: Layouts and Positioning
In this tutorial, you’ll learn how to align radio buttons in Python Tkinter using different methods.
From aligning radio buttons using the pack, grid, and place geometry managers to understanding the concepts of sticky, fill, and absolute positioning.
Align Radio Buttons Horizontally or Vertically
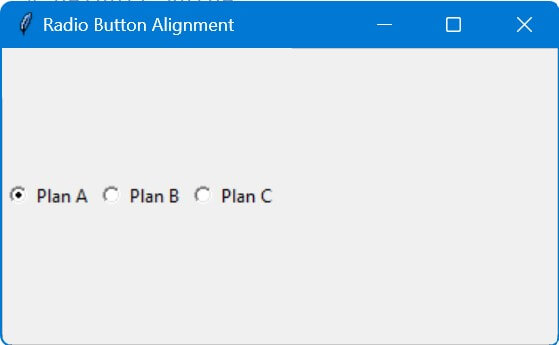
You can align radio buttons horizontally and vertically using the side option of the pack manager.
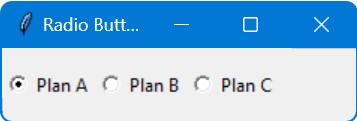
To align these radio buttons horizontally, set the side option to tk.RIGHTor tk.LEFT:
import tkinter as tk
root = tk.Tk()
root.title("Radio Button Alignment")
services = [("Plan A", 1), ("Plan B", 2), ("Plan C", 3)]
service_var = tk.IntVar()
service_var.set(1)
for text, value in services:
    tk.Radiobutton(root, text=text, variable=service_var, value=value).pack(side=tk.LEFT)
root.mainloop()
Output:
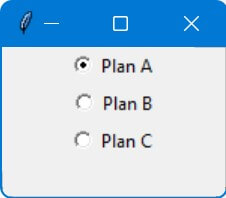
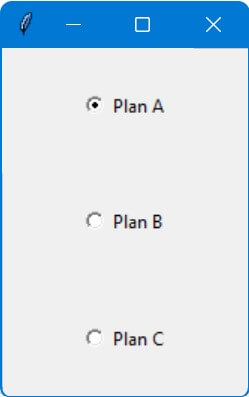
If you want to align them vertically, but along the right side of the window, set the side option to tk.TOP:
tk.Radiobutton(root, text=text, variable=service_var, value=value).pack(side=tk.TOP)
Output:
Align Radio Buttons Relative (Using Frame)
Tkinter pack geometry manager provides the anchor attribute, it allows you to align widgets relative to their designated sides.
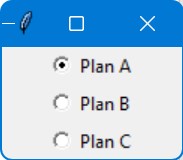
To align the radio buttons to the north (top) of the frame, you can set the anchor attribute to tk.N:
services = [("Plan A", 1), ("Plan B", 2), ("Plan C", 3)]
service_var = tk.IntVar()
service_var.set(1)
frame = tk.Frame(root)
frame.pack()
for text, value in services:
    tk.Radiobutton(frame, text=text, variable=service_var, value=value).pack(side=tk.TOP)
frame.pack(anchor=tk.N)
root.mainloop()
Output:
To align the radio buttons to the southeast (bottom right) corner of the window, you can set the anchor to tk.SE:
frame.pack(anchor=tk.SE)
root.mainloop()
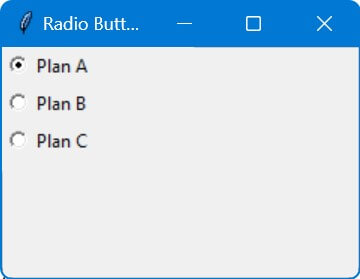
Similarly, you can align the radio buttons to different parts of the window using other anchor values like tk.SW, tk.NE, tk.NW, and tk.E. For example:
frame.pack(anchor=tk.NW)
root.mainloop()
Output:
Expand to Fill the Space
The fill option in the pack geometry manager allows you to expand and fill the available space either horizontally (X), vertically (Y), or both ways (BOTH).
This feature is useful when you want radio buttons to adjust their size dynamically with the window size.
To make the radio buttons expand vertically, use fill=tk.Y:
services = [("Plan A", 1), ("Plan B", 2), ("Plan C", 3)]
service_var = tk.IntVar()
service_var.set(1)  # default value
for text, value in services:
    rb = tk.Radiobutton(root, text=text, variable=service_var, value=value)
    rb.pack(side=tk.LEFT, fill=tk.Y)
root.mainloop()
Output:
If you want the radio buttons to expand in both directions, use fill=tk.BOTH:
for text, value in services:
    rb = tk.Radiobutton(root, text=text, variable=service_var, value=value)
    rb.pack(fill=tk.BOTH, expand=True)
root.mainloop()
Output:
The fill attribute, combined with the expand option set to True allows the widgets to grow in size to use any additional space in the window.
Align Radio Button Within Grid Cells
The sticky attribute allows you to align widgets like radio buttons within the cells of the grid.
This attribute uses compass directions (N, S, E, W, NE, SE, SW, NW) to stick the widget to a specific side or corner of the cell.
To align the first radio button to the north (top) of its cell, you can use:
services = [("Plan A", 1), ("Plan B", 2), ("Plan C", 3)]
service_var = tk.IntVar()
service_var.set(1)
for index, (text, value) in enumerate(services):
    rb = tk.Radiobutton(root, text=text, variable=service_var, value=value)
    rb.grid(row=index, column=0, sticky=tk.N)
root.mainloop()
You can similarly align other radio buttons using different sticky values like tk.SW, tk.NE, tk.NW, tk.E, and so on.
Absolute Positioning
In Tkinter, absolute positioning refers to placing widgets at specific x and y coordinates within a window or a frame.
Unlike pack or grid managers, absolute positioning does not automatically adjust widget positions when resizing the window.
If you want to position a radio button at a specific position, you can set the x and y position:
services = [("Plan A", 1), ("Plan B", 2), ("Plan C", 3)]
service_var = tk.IntVar()
service_var.set(1)
radio_buttons = []
for index, (text, value) in enumerate(services):
    rb = tk.Radiobutton(root, text=text, variable=service_var, value=value)
    rb.place(x=20, y=30 + index * 30)
    radio_buttons.append(rb)
radio_buttons[2].place(x=150, y=200)
root.mainloop()
Output:

Relative Positioning
Relative positioning in Tkinter allows you to position widgets based on a proportion of the parent container’s size rather than fixed pixel coordinates.
This method is useful for creating responsive layouts that adapt to changes in window size.
The relx and rely options in the place geometry manager are used for this purpose, where relx represents the relative horizontal position and rely the relative vertical position, both as fractions between 0 and 1.
First, let’s create a couple of radio buttons and position them relative to the window size:
services = [("Plan A", 1), ("Plan B", 2)]
service_var = tk.IntVar()
service_var.set(1)
rb1 = tk.Radiobutton(root, text="radio1", variable=service_var, value=1)
rb1.place(relx=0.1, rely=0.2, anchor='center')
rb2 = tk.Radiobutton(root, text="radio2", variable=service_var, value=2)
rb2.place(relx=0.1, rely=0.3, anchor='center')
root.mainloop()
The first is placed at 20% and the second at 30% of the window’s height.
When you resize the window, the radio buttons height will change according to the specified percentages.
Mokhtar is the founder of LikeGeeks.com. He is a seasoned technologist and accomplished author, with expertise in Linux system administration and Python development. Since 2010, Mokhtar has built an impressive career, transitioning from system administration to Python development in 2015. His work spans large corporations to freelance clients around the globe. Alongside his technical work, Mokhtar has authored some insightful books in his field. Known for his innovative solutions, meticulous attention to detail, and high-quality work, Mokhtar continually seeks new challenges within the dynamic field of technology.