Python PDF processing tutorial
PDF or Portable Document Format first was introduced by Adobe, but now the International Organization for Standardization (ISO) maintains it and it is an open standard.
Some of the main components of a PDF file are plain text, buttons, forms, radio buttons, images, audio, video, signature, and metadata.
In Python, we can perform different tasks to process the data from our PDF file and create PDF files.
In this tutorial using Python PDF processing libraries, we will create a PDF file, extract different components from it, and edit it with examples.
- 1 Popular Python PDF libraries
- 2 Extract text
- 3 Extract image
- 4 Extract a table
- 5 Extract URLs
- 6 Extract page as an image
- 7 Create PDF
- 8 Add text
- 9 Highlight text
- 10 Add an image
- 11 Add a table
- 12 Create a form
- 13 Fill a form
- 14 Resize page
- 15 Convert PDF to CSV or Excel
- 16 Add watermark
- 17 PDF metadata (read & edit)
Popular Python PDF libraries
The main libraries for dealing with PDF files are PyPDF2, PDFrw, and tabula-py. The pyPDF package was released in 2005.
The later developments of the package came as a response to making it compatible with different versions of Python and optimization purposes.
Now pyPDF, PyPDF2, and PyPDF4 versions of this library exist and the main difference between pyPDF and PyPDF2+ is that PyPDF2+ versions are made compatible with Python 3.
In this tutorial, we will run our code using PyPDF2 since PyPDF4 is not fully compatible with Python 3.
To install PyPDF2 for Python, we use the following pip command:
pip install pyPDF2
If you are using Anaconda, you can install PyPDF2 using the following command:
conda install pyPDF2
The PDFrw library is another alternative to PyPDF2. The main differences between these two libraries are the ability of PyPDF2 to encrypt files and the ability of PDFrw to integrate with ReportLab.
To install PDFrw for Python, we use the following pip command:
pip install PDFrw
If you are using Anaconda, you can install PDFrw using the following command:
conda install PDFrw
The tabula-py is a library vastly used by data science professionals to parse data from PDFs of unconventional format to tabulate it.
To install tabula-py for Python, we use the following pip command:
pip install tabula-py
If you are using Anaconda, you can install tabula-py using the following command:
conda install tabula-py
PyMuPDF is a multi-platform, lightweight PDF, XPS, and E-book viewer, renderer, and toolkit. It is also very convenient when dealing with images in a PDF file.
To install PyMuPDF for Python, we use the following pip command:
pip install PyMuPDF
pdf2image is a Python library for converting PDF files to images. To install it, we need to configure poppler to our system.
For Windows, we need to download it to our system and add the following to our PATH as an argument to convert_from_path:
poppler_path = r"C:\path\to\poppler-xx\bin"
For Linux users (Debian based), we can install it simply by:
sudo apt-get install poppler
After that, we can install pdf2image by running the following pip command:
pip install poppler-utils
ReportLab is also a Python library used to deal with PDF files. Especially the Canvas class of this library comes in handy for creating PDF files. We install it using the following pip command:
pip install reportlab
endesive is a Python library for digital signing and verification of digital signatures in the mail, PDF, and XML documents. We install it using the following pip command:
pip install endesive
Extract text
Sometimes, we need to extract text from PDF files and process it. For example, we have the following two-pages in the Example.PDF file with plain text in it: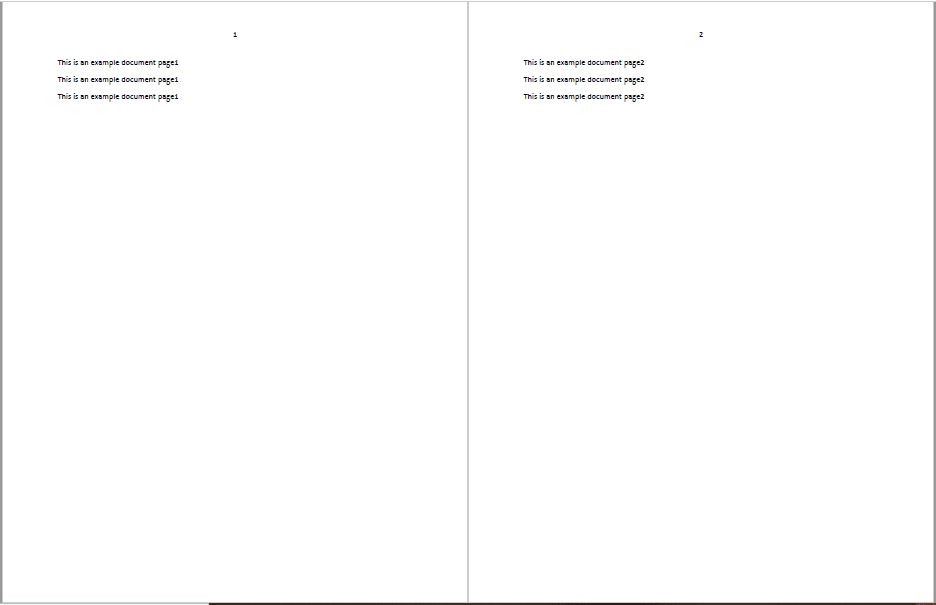
We save this file in the same directory where our Python file is saved.
To extract the text from the pages for processing, we will use the PyPDF2 library as follows:
from PyPDF2 import PdfFileReader as pfr
with open('pdf_file', 'mode_of_opening') as file:
    pdfReader = pfr(file)
    page = pdfReader.getPage(0)
    print(page.extractText())
In our code, we first import PdfFileReader from PyPDF2 as pfr. Then we open our PDF file in ‘rb’ (read and write) mode. Next, we create a pdfFileReader object for the file.
We can process the data using different methods of our pdfReader object.
For example, in the above code, we use the getPage method with an argument as the number of the page, and we create our page object, and now we can perform the extractText() method on it to get all the text out of it as a string. Now, as an example, let’s extract the data from the first page of our Example.pdf file:
from PyPDF2 import PdfFileReader as pfr
with open('Example.pdf', 'rb') as file:
    pdfReader = pfr(file)
    page = pdfReader.getPage(0)
    print(page.extractText())
Running this code, we get the following result which is the plain text of the page in string format: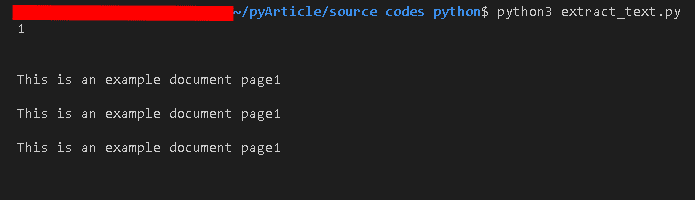
Extract image
In this section, we are going to parse a PDF file to save the images from it to our local machine. For this purpose, we use the PyMuPDF library to fetch it from our PDF file and Pillow to save it to our local machine.
To demonstrate this, we create a sample PDF file with images called ExtractImage.pdf and place it next to our Python file:![]()
Now, let’s have a look at the code below which retrieves the images from our PDF file and saves them in the current directory.
import fitz
import io
from PIL import Image
file_in_pdf_format = fitz.open("ExtractImage.pdf")
for page_number in range(len(file_in_pdf_format)):
    page = file_in_pdf_format[page_number]
    img_list = page.get_images()
    if len(img_list) == 0:
        print("There is no image on page ", page_number)
        pass
    for img_index, img in enumerate(page.get_images(), start=1):
        xref = img[0]
        base_img = file_in_pdf_format.extract_image(xref)
        img_bytes = base_img["image"]
        img_ext = base_img["ext"]
        image = Image.open(io.BytesIO(img_bytes))
        image.save(open(f"image{page_number + 1}_{img_index}.{img_ext}", "wb"))
As we can see in addition to pitz(PyMuPDF), io and Image from PIL are also imported.
PIL helps create an object of the image, and io helps us interact with the operating system to get the size of our file.
Running this piece of code, we get the following result:
The above image shows that after running the code, we get the images saved in the same directory. And the name of the images indicates the page where the image was found on, and its order.
Extract a table
Sometimes we have tables in our PDF files. To process them, we need to extract them from the PDF file and turn them into a Pandas DataFrame. For this purpose, we use tabula-py to extract the data from a file named ExtractTable.pdf, and pandas to process it further.
import tabula
tables = tabula.read_pdf("ExtractTable.pdf",pages="all")
print(tables)
As we can see from the above code snippet, dealing with a table in a PDF file is very simple. We read it by specifying the number of the page.
It returns the table as a pandas dataframe that we can further use and manipulate.
Running the above code on ExtractTable.pdf, we get this result:
Extract URLs
URLs or hyperlinks can also be detected in PDF files. For detecting them in our PDF file, we use re and PyPDF2 libraries.
Just as we extracted plain text, we can also extract the text from it and use regular expressions to extract the sequence of characters that are similar to URL patterns, ie http:// plus some other characters without any space. In the following example, we use ExtractURLs.pdf file to demonstrate.
import PyPDF2
import re
def url_finder(page_content):
   regex = r"(https?://\S+)"
   url = re.findall(regex,page_content)
   return url
with open("ExtractURLs.pdf", 'rb') as file:
    readPDF = PyPDF2.PdfFileReader(file)
    for page_no in range(readPDF.numPages):
        page=readPDF.getPage(page_no)
        text = page.extractText()
        print(f"URLS of page {page_no}: "+str(url_finder(text)))
    file.close()
In the code above, our regular expression “https?://\S+” first selects all of the strings that start with http or https (the question mark means the s is optional) till it finds white space which means the URL is ended.
Running the above code, we get the following result:![]()
As we can see, our code returns the URLs of each page in a list.
Extract page as an image
Sometimes we need to convert the pages of our PDF file into images. For this purpose, we use the pdf2image library.
This module returns a list of all the pages. Then, calling save on each of the elements of the list with the name and format of the image, we save them into our machine.
Here’s an example that demonstrates it using a file named Example.pdf.
from pdf2image import convert_from_path
imgs = convert_from_path('Example.pdf')
for i in range(len(imgs)):
    imgs[i].save('Page'+ str(i+1) +'.jpg', 'JPEG')
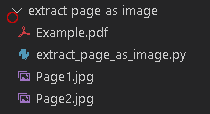
Running the above code, we get the images saved in our working directory as JPEG images. ![]()
Create PDF
For creating PDF files we can use the Canvas class of the reportlab library. We first create an object of class Canvas with an argument as the name of our PDF file, pdffile.pdf.
Next, we call the drawString method on it with arguments as the location and the content to be placed. Lastly, we save our file.
from reportlab.pdfgen.canvas import Canvas
canv = Canvas("pdffile.pdf")
canv.drawString(72,72,"This is a PDF file.")
canv.save()
Here is the result of running our create_pdf.py file.
Add text
As seen in the above section, we pass our text as an argument to drawString and specify its place. The location identifier tells the distance from the left bottom. It specifies the beginning of the string.
As seen above, this is how our text will be displayed on the page in our file pdffile.pdf.
Highlight text
For highlighting text in PDF files, we use the PyMuPDF library. First, we open our PDF file pdffile.pdf using the PyMuPDF library. Then we iterate through the pages to highlight the specified sequence of characters.
import fitz
pdf_file = fitz.open("pdffile.pdf")
for page in pdf_file:
    text_to_be_highlighted = "PDF"
    highlight = p.searchFor(text_to_be_highlighted)
    for inst in highlight:
        highlight = page.addHighlightAnnot(inst)
        highlight.update()
pdf_file.save("output.pdf", garbage=4, deflate=True, clean=True)

The PDF file before highlighting.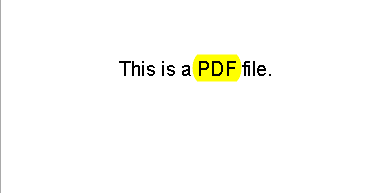
The PDF file after highlighting.
Add an image
To add an image to a PDF file, we use the PyMuPDF library. For this purpose, we choose our current file pdffile.pdf, destination file pdffilewithimage.pdf, and the image to be inserted:
import fitz
pdf_file = "pdffile.pdf"
pdf_file_with_image = "pdffilewithimage.pdf"
image = "cat.png"
location = fitz.Rect(450,20,550,120)
file_handle = fitz.open(pdf_file)
first_page = file_handle[0]
first_page.insertImage(filename = image,rect=location)
file_handle.save(pdf_file_with_image)
As seen above, using the Rect method, we create a rectangle where we want to fit our image. Running the above code, we see the following in our PDF file.
PDF file without image
PDF file after an image is inserted.
Add a table
To add a table to a PDF file we use the reportlab library. The code below imports all the necessary modules and creates a PDF file named table_pdf.pdf.
from reportlab.lib.pagesizes import A4
from reportlab.platypus import SimpleDocTemplate, Table, TableStyle
doc = SimpleDocTemplate("table.pdf", pagesize=A4)
members = []
frame= [['#', 'id', 'name'],['1', '2332', 'Jack'],['2', '3573', 'Jerry']]
table=Table(frame)
members.append(table)
doc.build(members)
As seen above, after importing all the necessary modules from the library, we will create an object with the name of the PDF file and the size of its pages as arguments.
Then we add the rows to a new list and pass it as an argument to our Table class.
After that, we append the result to our ‘members’ list, and finally, to save it on our doc, we call the build method on our doc with members as an argument to it, and it will be saved in our PDF file.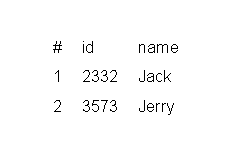
This is the final PDF table_pdf.pdf, with a page that contains lists of frame as its rows.
Create a form
To create a form in our PDF file, we mainly use the canvas module of the reportlab library. Similar to other types of forms, our PDF form also contains a text field, radio button, multiple-choice, and checkboxes.
The final result is stored in form_pdf.pdf
from reportlab.pdfgen import canvas
from reportlab.lib.colors import magenta, pink, blue, green
myCanvas = canvas.Canvas('form_pdf.pdf')
myCanvas.setFont("Helvetica", 18)
myCanvas.drawCentredString(500, 500, 'A Form')
interactiveForm = myCanvas.acroForm
myCanvas.drawString(20, 500, 'Name:')
interactiveForm.textfield(name='fname', tooltip='Your Name',
            x=100, y=600, borderStyle='solid',
            borderColor=green, fillColor=pink,
            width=200,
            textColor=magenta, forceBorder=True)
myCanvas.drawString(30, 600, 'Male:')
interactiveForm.radio(name='radio2', tooltip='Radio field 2',
        value='value1', selected=True,
        x=100, y=600, buttonStyle='diamond',
        borderStyle='solid', shape='square',
        borderColor=magenta, fillColor=pink,
        borderWidth=1,
        textColor=blue, forceBorder=True)
interactiveForm.radio(name='radio2', tooltip='Radio field 2',
        value='value2', selected=False,
        x=100, y=600, buttonStyle='diamond',
        borderStyle='solid', shape='square',
        borderColor=magenta, fillColor=pink,
        borderWidth=1,
        textColor=blue, forceBorder=True)
myCanvas.drawString(150, 659, 'Female:')
interactiveForm.radio(name='radio3', tooltip='Radio Field 3',
        value='value1', selected=False,
        x=200, y=650, buttonStyle='diamond',
        borderStyle='solid', shape='circle',
        borderColor=blue, fillColor=green,
        borderWidth=2,
        textColor=blue, forceBorder=False)
interactiveForm.radio(name='radio3', tooltip='Field radio3',
        value='value2', selected=True,
        x=200, y=650, buttonStyle='diamond',
        borderStyle='solid', shape='circle',
        borderColor=magenta, fillColor=pink,
        borderWidth=1,
        textColor=blue, forceBorder=True)
myCanvas.drawString(5, 650, 'Pick a character:')
options = [('Tom', 'tom'), ('Jerry', 'jerry'), ('Spike', 'spike')]
interactiveForm.choice(name='choice2', tooltip='Choice 2',
            value='Tom',
            options=options,
            x=190, y=550, width=70, height=30,
            borderStyle='bevelled', borderWidth=2,
            forceBorder=True)
myCanvas.save()
In the above code, first, we create an object of the Canvas class and set its font. Then, we create a form variable.
Now for putting strings to our pdf file, we use the object of our Canvas class, and for defining our form, we use the variable ‘form’. After running the above code, we get the following PDF form.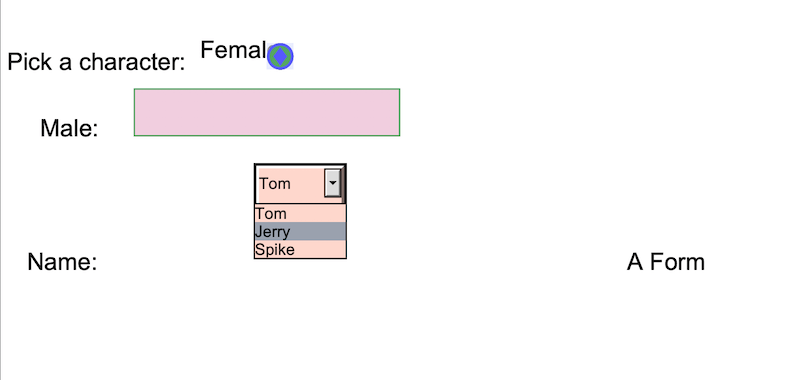
Fill a form
For filling forms with Python, we use the pdfrw library. In our PDF form form_pdf.pdf, we have a field as fname and we are supposed to put there Bob Martin.
For this purpose, we first, open our input file, read it and parse through the pages. Then we define the data for filling as a dictionary. In the end, we pass it to our fill_pdf function as an argument along with data_dict and pdf output.
import pdfrw
source = "form_pdf.pdf"
destination = "output.pdf"
myTemplate = pdfrw.PdfReader(source)
MYKEY = '/Annots'
FIELDKEY = '/T'
VALUE_KEY = '/V'
RECTKEY = '/Rect'
SUB_KEY = '/Subtype'
WIDGET= '/Widget'
data = {
    'fname': 'Bob Martin'
}
def fill_form(source, dest, data):
    myTemplate = pdfrw.PdfReader(source)
    for pg_number in myTemplate.pages:
        annots = pg_number[MYKEY]
        for annot in annots:
            if annot[SUB_KEY] == WIDGET:
                if annot[FIELDKEY]:
                    key = annot[FIELDKEY][1:-1]
                    if key in data.keys():
                        if type(data[key]) == bool:
                            if data[key] == True:
                                annot.update(pdfrw.PdfDict(AS=pdfrw.PdfName('Yes')))
                        else:
                            annot.update(pdfrw.PdfDict(V='{}'.format(data[key])))
                            annot.update(pdfrw.PdfDict(AP=''))
    pdfrw.PdfWriter().write(dest, myTemplate)
fill_form(source, destination, data)
After running the above code, we will get the name in the field as shown below: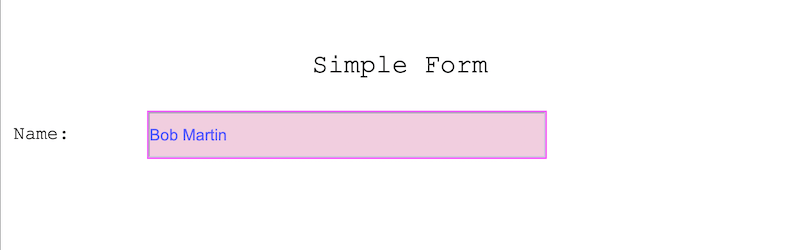
Resize page
Sometimes we need to resize our PDF files. For this purpose, we can use PyPDF2. In the following code, we resize the file pdffile.pdf to “resizedpdffile.pdf”.
import PyPDF2
pdf_file = "pdffile.pdf"
pdf_file = PyPDF2.PdfFileReader(pdf)
p0 = pdf_file.getPage(0)
p0.scaleBy(0.5)
pdf_writer = PyPDF2.PdfFileWriter()
pdf_writer.addPage(0)
with open("resizedpdffile.pdf", "wb+") as f:
    pdf_writer.write(f)
The above code first reads our PDF file then takes the first page of it. Then it scales our PDF file and opens pdfwriter. In the end, it adds a page to pdfwriter and opening a new PDF file “resizedpdffile.pdf” adds the scaled page to it.
Convert PDF to CSV or Excel
When we have our data as a table in a PDF file, we can retrieve it and save it as a CSV file using the tabula-py library. Below, the code converts the PDF file table_pdf.pdf to CSV.
import tabula as tb
df = tb.read_pdf("table_pdf.pdf", pages='all')
tb.convert_into("table_pdf.pdf", "table_pdf_in_csv.csv", output_format="csv", pages='all')
print(df)
After running the above code, we will have our CSV file also saved in the working directory.
Add watermark
Watermark is a background display that is commonly used in Word and PDF files. To add watermark to PDF in Python we use the PyPDF2 library. The code adds a watermark to pdffile.pdf and saves a new file with the name watermark.pdf
import PyPDF2
pdf_file = "pdffile.pdf"
watermark = "watermark.pdf"
final = "merged.pdf"
input = open(pdf_file,'rb')
input_pdf = PyPDF2.PdfFileReader(pdf_file)
watermark_handle = open(watermark,'rb')
watermark_file = PyPDF2.PdfFileReader(watermark_handle)
pdf_page = input_pdf.getPage(0)
watermark_page = watermark_file.getPage(0)
pdf_page.mergePage(watermark_page)
generated_pdf = PyPDF2.PdfFileWriter()
generated_pdf.addPage(pdf_page)
final = open(final,'wb')
generated_pdf.write(final)
final.close()
watermark_handle.close()
input.close()
In the code above, first, we import PyPDF2 and store the content of the pdf and watermark file. Next, we open them read their content, and access their first page.
Then we merge the watermark file on the PDF file and write the result to our final file. In the end, we close all our files.
Our PDF file.
Our watermark file.
Our watermarked PDF file.
PDF metadata (read & edit)
To well maintain our PDF file, we should add metadata to it. In the example below, we add metadata to our PDF file pdffilewithimage.pdf using pdfrw library.
from pdfrw import PdfReader, PdfWriter, PdfDict
pdf_file = PdfReader('pdffilewithimage.pdf')
metadata_info = PdfDict(Author='LikeGeeks', Title='PDF Title')
pdf_file.Info.update(metadata_info)
PdfWriter().write('new.pdf', pdf_file)
As seen in the code, we first open the pdf file using PdfReader class. Next, we create our metadata object and then add it to the file. Lastly, we write it all to our ‘new.pdf’ file.
To read the metadata of our PDF file, we use the PdfFileReader module of PyPDF2 library.
from PyPDF2 import PdfFileReader
with open("new.pdf", "rb") as f:
    pdffile = PdfFileReader(f)
    pdf_info = pdffile.getDocumentInfo()
    print(pdf_info)
Running the above code we get the following result.
Mokhtar is the founder of LikeGeeks.com. He is a seasoned technologist and accomplished author, with expertise in Linux system administration and Python development. Since 2010, Mokhtar has built an impressive career, transitioning from system administration to Python development in 2015. His work spans large corporations to freelance clients around the globe. Alongside his technical work, Mokhtar has authored some insightful books in his field. Known for his innovative solutions, meticulous attention to detail, and high-quality work, Mokhtar continually seeks new challenges within the dynamic field of technology.
I tried to highlight text following your example but got the following error:
—————————————————————————
AttributeError Traceback (most recent call last)
in ()
7 text_to_be_highlighted = “blood”
8
—-> 9 highlight = page.searchFor(text_to_be_highlighted)
10
11 for inst in highlight:
AttributeError: ‘Page’ object has no attribute ‘searchFor’
Hi,
It looks like you’re using an old version or maybe you are using a newer version and the function is depricated.