Send Emails using Python (Multiple Examples)
Python lets you automate the task of sending emails by using its built-in modules. Doing so frees you from the tedious and time-consuming task of manually sending emails to thousands of users.
This tutorial will look into some fast, easy ways of sending emails and working with Python’s built-in email modules.
- 1 Check if Email Exists
- 2 Python Email server
- 3 Send Email with Python
- 4 Sending Emails via SMTP
- 5 Send with SMTP SSL
- 6 Send Email without SMTP server
- 7 Email MIME text
- 8 Send HTML Email
- 9 Specify CC and BCC
- 10 Send Email with attachment
- 11 Send Email with inline images
- 12 Send Email to internationalized Email address (non ASCII)
- 13 Send DKIM signed mail
- 14 Send Emails to multiple recipients
Check if Email Exists
Often, you may want to check whether an email entered by a user is a valid email or syntactically incorrect. Moreover, you may also want to check whether the email address actually exists. This can be quickly done using Python.
A valid email address has a specific format. There always exists an ‘@’ symbol. The prefix is the part before the @ sign, and the postfix is followed after the @ sign.
The postfix has to be a verified domain name. Email addresses can contain numbers, alphabets, periods, dashes, and underscores.
If a dash or underscore is used, it needs to be followed by an alphabet or a number. These are the rules that define a correct email address.
Python’s re module comes in handy if you want to check the syntax of an email address entered by a user. ‘re’ is a short form for regular expressions.
You can create a regular expression that matches the syntax of a valid email. To do this, you need to understand how regular expressions work. Below is a regular expression that checks the syntax for an email address.
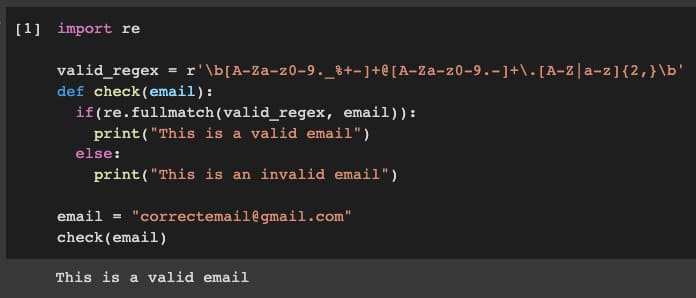
import re
valid_regex = r'\b[A-Za-z0-9._%+-]+@[A-Za-z0-9.-]+\.[A-Z|a-z]{2,}\b'
def check(email):
  if(re.fullmatch(valid_regex, email)):
    print("This is a valid email")
  else:
    print("This is an invalid email")
email = "correctemail@gmail.com"
check(email)
Using the re module requires you to have a solid understanding of the regular expressions.
An even better way to check whether an email exists is to use a third-party package named validate-email-address. You can install this module using a package manager such as pip.
$ pip install py3-validate-email
from validate_email import validate_email
valid_email = validate_email(email_address='example@gmail.com')

The great thing about this package is that it checks the syntax of an email and checks whether the given email address exists by simulating an actual email delivery. To do this, you need to set the check_smtp flag to true.
from validate_email import validate_email
valid_email = validate_email(email_address='example@gmail.com', check_smtp = True)

Python Email server
To send emails using Python, you need to set up an email server first. The most common way and the industry-standard protocol for sending emails is by using the SMTP protocol.
SMTP is an abbreviation for Simple Mail Transfer Protocol. Email service providers make use of SMTP servers and the SMTP protocol to send or relay messages.
You can create your own SMTP email server using the smtplib module of Python. The module lets you send simple messages without a subject line or multimedia.
Python also has an inbuilt email package that allows you to send additional attachments alongside your text message. When used in conjunction with the smtplib module, you can send rich emails with attachments and subject lines.
To create an email server using the smtplib module, you first need to run the import statement.
import smtplib
You can then create an SMTP instance that encapsulates an SMTP connection. You can set up the optional parameters host and port to specify the port and host, depending upon your particular email service provider.
To set up a connection that closes automatically, you need to use the ‘with’ statement.
from smtplib import SMTP
with SMTP(host= "exampledomain.com", port= 587) as smtp:
    smtp.starttls()
    smtp.noop()

When you use SMTP, the connection initiated is not secure. This is why you need to encrypt it using starttls().
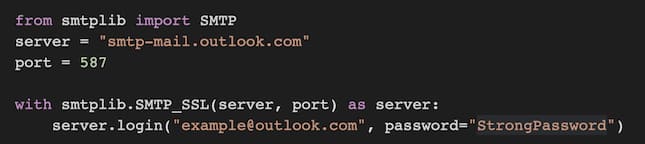
An alternative is to start a secure connection from the beginning rather than encrypting it after the connection has been initiated. The SMTP_SSL instance is used for this case.
from smtplib import SMTP
server = "smtp-mail.outlook.com"
port = 587
with smtplib.SMTP_SSL(server, port) as server:
    server.login("example@outlook.com", password="StrongPassword")
Send Email with Python
Once you have set up your email server, you can relay emails to valid addresses. The sendmail() function does this. It requires you to specify the email address of the sender and receiver, along with the message.
If your SMTP server requires authentication to send a message, you’ll need to enter the credentials of your email account.
You can pass the username and password to the login() function, which will perform the authentication.
When using the smtplib module, there are two ways you could go about sending emails. Both of them ensure that your SMTP connection is secure and encrypted.
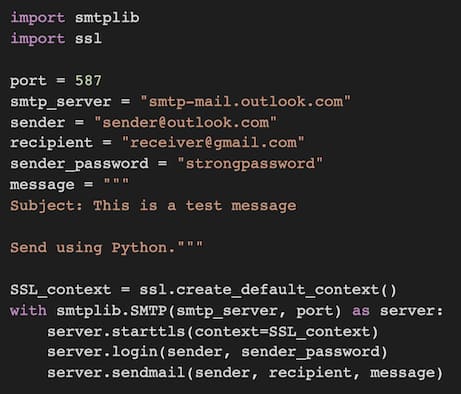
Sending Emails via SMTP
As seen earlier, you can first initiate a connection that is not encrypted over TLS, and later encrypt it using starttls(). In this case, an instance of the SMTP class is created.
import smtplib
import ssl
port = 587
smtp_server = "smtp-mail.outlook.com"
sender = "sender@outlook.com"
recipient = "receiver@gmail.com"
sender_password = "strongpassword"
message = """
Subject: This is a test message
Sent using Python."""
SSL_context = ssl.create_default_context()
with smtplib.SMTP(smtp_server, port) as server:
    server.starttls(context=SSL_context)
    server.login(sender, sender_password)
    server.sendmail(sender, recipient, message)
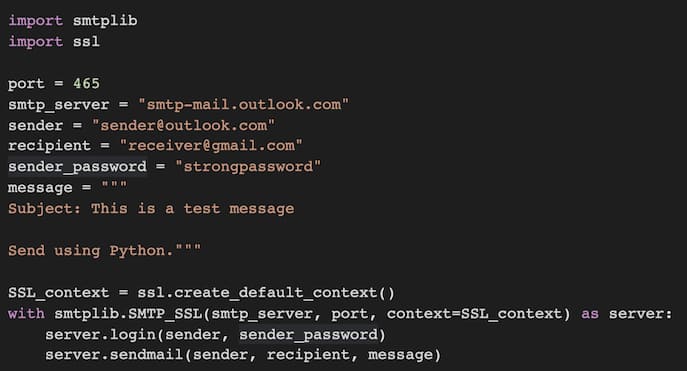
Send with SMTP SSL
The second way to send an email is to initiate a secure connection over TLS. This is the right option in situations where SSL is required from the beginning of the connection.
import smtplib
import ssl
port = 465
smtp_server = "smtp-mail.outlook.com"
sender = "sender@outlook.com"
recipient = "receiver@gmail.com"
sender_password = "strongpassword"
message = """
Subject: This is a test message
Send using Python."""
SSL_context = ssl.create_default_context()
with smtplib.SMTP_SSL(smtp_server, port, context=SSL_context) as server:
    server.login(sender, sender_password)
    server.sendmail(sender, recipient, message)
Send Email without SMTP server
If you do not want to set up an SMTP server to send emails, the chilkat module will be your best bet. It contains the Chilkat MailMan class, which is responsible for sending and receiving emails through SMTP and POP3 servers, respectively.
The module provides a method MxLookup that performs a DNS MX lookup to find the mail server using the recipient’s email address. You’ll need to install the chilkat module for doing this.
import sys
import chilkat
mailman = chilkat.CkMailMan()
receiver_address = "example@domain.com"
smtpHost = mailman.mxLookup(receiver_address)
if (mailman.get_LastMethodSuccess() != True):
    print(mailman.lastErrorText())
    sys.exit()
mailman.put_SmtpHost(smtpHost)
mail = chilkat.CkEmail()
mail.put_Subject("A test subject")
mail.put_Body("Hello!")
mail.put_From("")
mail.AddTo("", receiver_address)
success = mailman.SendEmail(mail)
if (success != True):
    print(mailman.lastErrorText())
else:
    print("Sent!")

Email MIME text
If you want to send plain text emails without subjects or emphasis (bolds, italics, or underlines), the smtplib module from Python is enough to get the job done.
However, you often want to add attachments (images, hyperlinks, etc.) or responsive content in real-life scenarios with your plain text. Python’s built-in email module comes in handy in such situations.
MIME, an abbreviation for Multipurpose Internet Mail Extensions, is a type of email that uses HTML combined with plain text.
It extends the SMTP protocol to support images, videos, audio, and other attachments. Python’s email.mime module allows you to include HTML or attachments when sending emails over the SMTP server.
To do that, you need to import the modules by running the following statement.
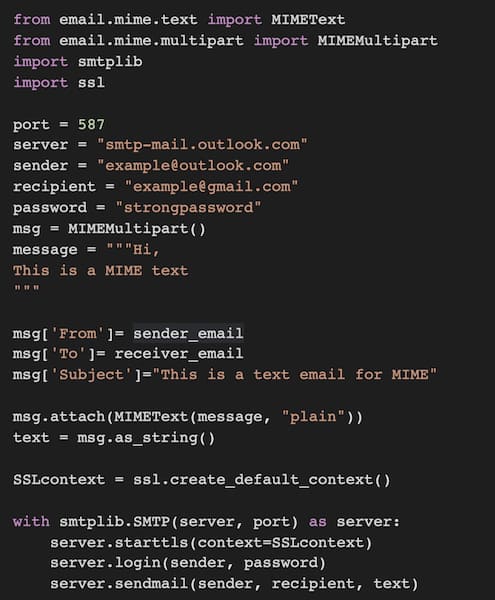
from email.mime.text import MIMEText
from email.mime.multipart import MIMEMultipart
import smtplib
import ssl
port = 587
server = "smtp-mail.outlook.com"
sender = "example@outlook.com"
recipient = "example@gmail.com"
password = "strongpassword"
msg = MIMEMultipart()
message = """Hi,
This is a MIME text
"""
msg['From']= sender_email
msg['To']= receiver_email
msg['Subject']="This is a text email for MIME"
msg.attach(MIMEText(message, "plain"))
text = msg.as_string()
SSLcontext = ssl.create_default_context()
with smtplib.SMTP(server, port) as server:
    server.starttls(context=SSLcontext)
    server.login(sender, password)
    server.sendmail(sender, recipient, text)
Send HTML Email
Besides sending MIME text over an SMTP server, the email.mime also works well for sending HTML emails. The process is exactly the same as above, with a subtle difference in the MIMEText() function.
You passed “plain” as the second argument in the previous code example since the message was a simple plain text. When you want to send an HTML text, you change your text and this argument to “html.”
from email.mime.text import MIMEText
from email.mime.multipart import MIMEMultipart
import smtplib
import ssl
port = 587
server = "smtp-mail.outlook.com"
sender = "example@outlook.com"
recipient = "example@gmail.com"
password = "strongpassword"
msg = MIMEMultipart()
html_message = """
<html>
    <body>
        <p>
       This is HTML<br>
       </p>
    </body>
</html>
"""
msg.attach(MIMEText(html_message, "html"))
text = msg.as_string()
SSLcontext = ssl.create_default_context()
with smtplib.SMTP(server, port) as server:
    server.starttls(context=SSLcontext)
    server.login(sender, password)
    server.sendmail(sender, recipient, text)

Specify CC and BCC
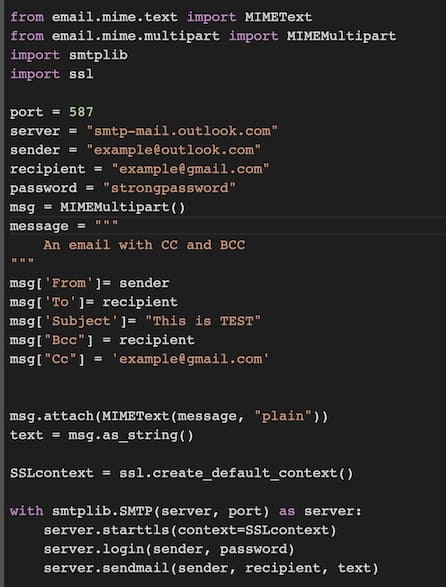
The email.mime module also lets you specify CC and BCC recipients within your email message. To do so, you need to specify additional headers in your Multipart message.
from email.mime.text import MIMEText
from email.mime.multipart import MIMEMultipart
import smtplib
import ssl
port = 587
server = "smtp-mail.outlook.com"
sender = "example@outlook.com"
recipient = "example@gmail.com"
password = "strongpassword"
msg = MIMEMultipart()
message = """
    An email with CC and BCC
"""
msg['From']= sender
msg['To']= recipient
msg['Subject']= "This is TEST"
msg["Bcc"] = recipient
msg["Cc"] = 'example@gmail.com'
msg.attach(MIMEText(message, "plain"))
text = msg.as_string()
SSLcontext = ssl.create_default_context()
with smtplib.SMTP(server, port) as server:
    server.starttls(context=SSLcontext)
    server.login(sender, password)
    server.sendmail(sender, recipient, text)
Send Email with attachment
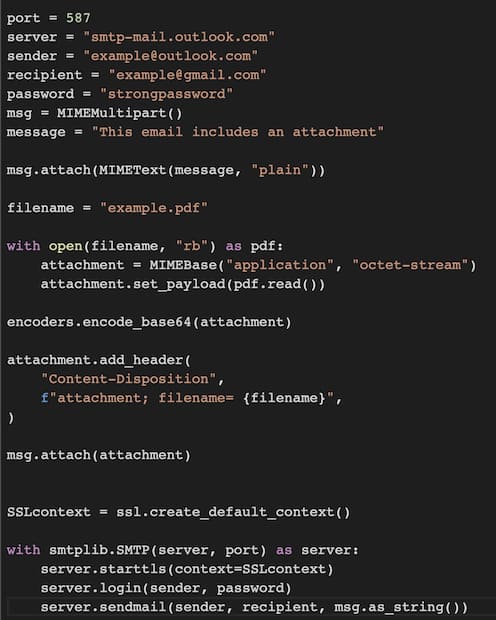
Attachments are sent over the SMTP server in the form of binary files. To do so, you need to encode the attachments in base64, a common binary-to-text encoding scheme for encoding binary data into ASCII characters.
For instance, you can send a pdf file by reading it as an octet-stream with a MIMEBase instance and encoding it using the encoders module within Python’s email library.
from email.mime.base import MIMEBase
from email.mime.multipart import MIMEMultipart
from email.mime.text import MIMEText
import smtplib, ssl
from email import encoders
port = 587
server = "smtp-mail.outlook.com"
sender = "example@outlook.com"
recipient = "example@gmail.com"
password = "strongpassword"
msg = MIMEMultipart()
message = "This email includes an attachment"
msg.attach(MIMEText(message, "plain"))
filename = "example.pdf"
with open(filename, "rb") as pdf:
    attachment = MIMEBase("application", "octet-stream")
    attachment.set_payload(pdf.read())
encoders.encode_base64(attachment)
attachment.add_header(
    "Content-Disposition",
    f"attachment; filename= {filename}",
)
msg.attach(attachment)
SSLcontext = ssl.create_default_context()
with smtplib.SMTP(server, port) as server:
    server.starttls(context=SSLcontext)
    server.login(sender, password)
    server.sendmail(sender, recipient, msg.as_string())
Send Email with inline images
Sometimes you may want to embed images inside the HTML text. To do that, you can convert your image into a base64 encoded format and send it over.
Fortunately, Python has a library to do that for you. You can import the base64 library and use the b64encode() function that does this seamlessly.
from email.mime.multipart import MIMEMultipart
from email.mime.text import MIMEText
from email.mime.image import MIMEImage
import smtplib, ssl, base64
port = 587
server = "smtp-mail.outlook.com"
sender = "sender@outlook.com"
recipient = "receiver@gmail.com"
password = "strongPassword"
msg = MIMEMultipart()
msg['From']= sender
msg['To']= recipient
msg['Subject']= "My subject"
filename = "example.jpg"
image = base64.b64encode(open(filename, "rb").read())
image_base64 = image.decode()
html_img = """
<html>
    <body>
        <p>
            <img src= "data:image/jpg;base64,{image_base64}">
       </p>
    </body>
</html>
"""
msg.attach(MIMEText(html_img, "html"))
text = msg.as_string()
context = ssl.create_default_context()
with smtplib.SMTP(smtp_server, port) as server:
    server.starttls(context=context)
    server.login(sender, password )
    server.sendmail(sender, recipient, text)

Send Email to internationalized Email address (non ASCII)
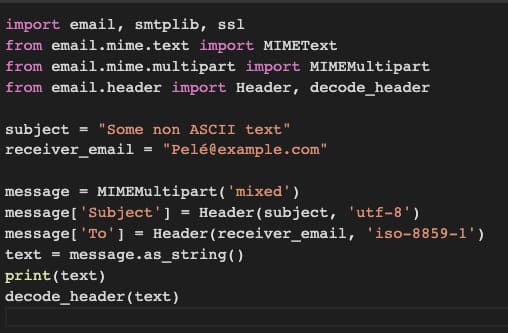
Before emails gained worldwide recognition, they were mainly composed of ASCII characters and compiled with RFC 822 standard.
These days emails are sent internationally in many more character sets that are language-specific. To send internationalized emails, you need to use the email.header module, which encodes non-ASCII characters into RFC 2822-compliant format.
If your subject or sender fields contain non-ASCII characters, you can use the Header class to create a Header instance and pass the character set that the string was encoded in.
A corresponding decode_header() function decodes the encoded string into the original character set.
import email, smtplib, ssl
from email.mime.text import MIMEText
from email.mime.multipart import MIMEMultipart
from email.header import Header, decode_header
subject = "Some non ASCII text"
receiver_email = "Pelé@example.com"
message = MIMEMultipart('mixed')
message['Subject'] = Header(subject, 'utf-8')
message['To'] = Header(receiver_email, 'iso-8859-1')
text = message.as_string()
print(text)
decode_header(text)
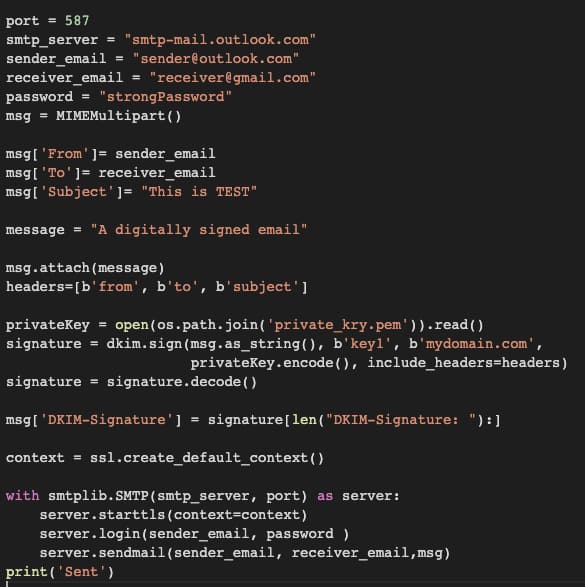
Send DKIM signed mail
Using Python, you can send digitally signed emails using your private key. This is extremely useful in situations where authentication of a sender is essential.
To do that, you need to install a third-party package named dkimpy. You’ll need to install the package using the setup.py file.
Once done, you can import it by running the statement:
import dkim
Now you can generate a signature of your message using your private key (You’ll need to generate a public/private keypair for doing this). After that, you’ll have to attach the digital signature to your Multipart message and you’re all set.
import smtplib, dkim, time, os
from email.mime.multipart import MIMEMultipart
from email.mime.text import MIMEText
port = 587
smtp_server = "smtp-mail.outlook.com"
sender_email = "sender@outlook.com"
receiver_email = "receiver@gmail.com"
password = "strongPassword"
msg = MIMEMultipart()
msg['From']= sender_email
msg['To']= receiver_email
msg['Subject']= "This is TEST"
message = "A digitally signed email"
msg.attach(message)
headers=[b'from', b'to', b'subject']
privateKey = open(os.path.join('private_kry.pem')).read()
signature = dkim.sign(msg.as_string(), b'key1', b'mydomain.com', privateKey.encode(), include_headers=headers)
signature = signature.decode()
msg['DKIM-Signature'] = signature[len("DKIM-Signature: "):]
context = ssl.create_default_context()
with smtplib.SMTP(smtp_server, port) as server:
    server.starttls(context=context)
    server.login(sender_email, password )
    server.sendmail(sender_email, receiver_email,msg)
print('Sent')
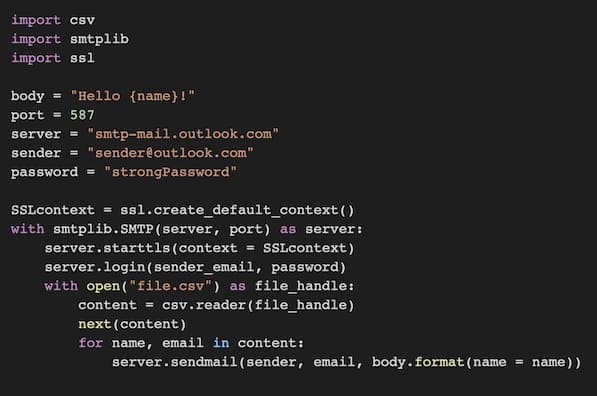
Send Emails to multiple recipients
The real benefits of email automation are reaped when you want to send personalized emails to multiple recipients. Perhaps you have a CSV file that contains many users’ names and email addresses.
You can read the CSV file in Python and loop over each line to retrieve the name and email of the recipient.
Once you have the recipient’s information, you can make your message more personalized by using str.format() and placeholders. Here’s how you do it:
import csv
import smtplib
import ssl
body = "Hello {name}!"
port = 587
server = "smtp-mail.outlook.com"
sender = "sender@outlook.com"
password = "strongPassword"
SSLcontext = ssl.create_default_context()
with smtplib.SMTP(server, port) as server:
    server.starttls(context = SSLcontext)
    server.login(sender_email, password)
    with open("file.csv") as file_handle:
        content = csv.reader(file_handle)
        next(content)
        for name, email in content:
            server.sendmail(sender, email, body.format(name = name))
Mokhtar is the founder of LikeGeeks.com. He is a seasoned technologist and accomplished author, with expertise in Linux system administration and Python development. Since 2010, Mokhtar has built an impressive career, transitioning from system administration to Python development in 2015. His work spans large corporations to freelance clients around the globe. Alongside his technical work, Mokhtar has authored some insightful books in his field. Known for his innovative solutions, meticulous attention to detail, and high-quality work, Mokhtar continually seeks new challenges within the dynamic field of technology.