Python Image Processing Tutorial (Using OpenCV)
In this tutorial, you will learn how you can process images in Python using the OpenCV library.
OpenCV is a free open source library used in real-time image processing. It’s used to process images, videos, and even live streams, but in this tutorial, we will process images only as a first step. Before getting started, let’s install OpenCV.
- 1 Install OpenCV
- 2 Rotate an Image
- 3 Crop an Image
- 4 Resize an Image
- 5 Adjust Image Contrast
- 6 Make an image blurry
- 7 Detect Edges
- 8 Convert image to grayscale (Black & White)
- 9 Centroid (Center of blob) detection
- 10 Extracting text from Image (OCR)
- 11 Detect and correct text skew
- 12 Color Detection
- 13 Reduce Noise
- 14 Get image contour
- 15 Remove Background from an image
Install OpenCV
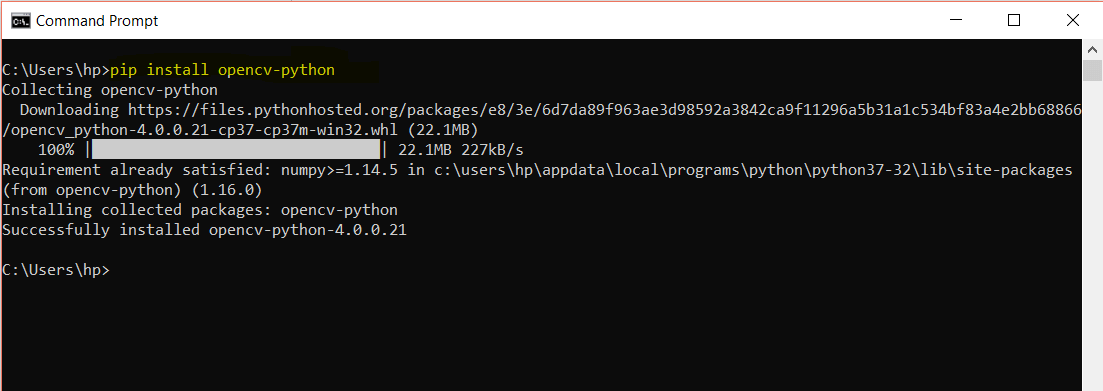
To install OpenCV on your system, run the following pip command:
pip install opencv-python
Now OpenCV is installed successfully and we are ready. Let’s have some fun with some images!
Rotate an Image
First of all, import the cv2 module.
import cv2
Now to read the image, use the imread() method of the cv2 module, specify the path to the image in the arguments and store the image in a variable as below:
img = cv2.imread("pyimg.jpg")
The image is now treated as a matrix with rows and columns values stored in img.
Actually, if you check the type of the img, it will give you the following result:
>>>print(type(img))
<class 'numpy.ndarray'>
It’s a NumPy array! That why image processing using OpenCV is so easy. All the time you are working with a NumPy array.
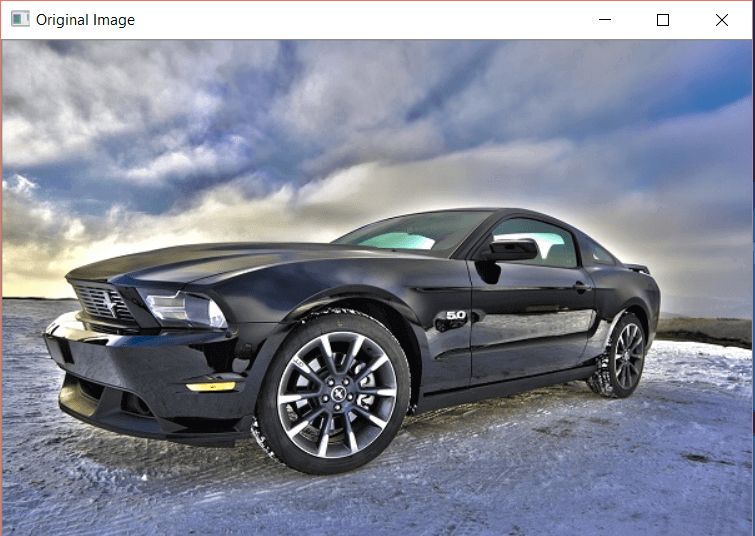
To display the image, you can use the imshow() method of cv2.
cv2.imshow('Original Image', img)
cv2.waitKey(0)
The waitkey functions take time as an argument in milliseconds as a delay for the window to close. Here we set the time to zero to show the window forever until we close it manually.
To rotate this image, you need the width and the height of the image because you will use them in the rotation process as you will see later.
height, width = img.shape[0:2]
The shape attribute returns the height and width of the image matrix. If you print
img.shape[0:2]
, you will have the following output:

Okay, now we have our image matrix and we want to get the rotation matrix. To get the rotation matrix, we use the getRotationMatrix2D() method of cv2. The syntax of getRotationMatrix2D() is:
cv2.getRotationMatrix2D(center, angle, scale)
Here the center is the center point of rotation, the angle is the angle in degrees and scale is the scale property which makes the image fit on the screen.
To get the rotation matrix of our image, the code will be:
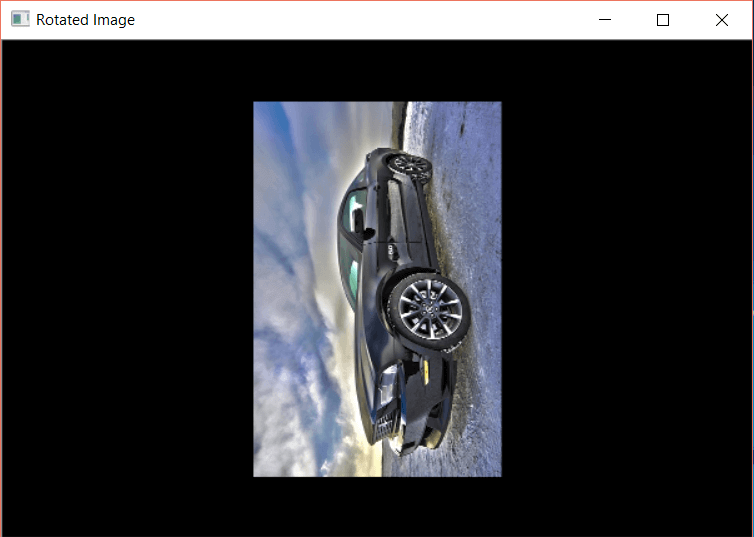
rotationMatrix = cv2.getRotationMatrix2D((width/2, height/2), 90, .5)
The next step is to rotate our image with the help of the rotation matrix.
To rotate the image, we have a cv2 method named wrapAffine which takes the original image, the rotation matrix of the image and the width and height of the image as arguments.
rotatedImage = cv2.warpAffine(img, rotationMatrix, (width, height))
The rotated image is stored in the rotatedImage matrix. To show the image, use imshow() as below:
cv2.imshow('Rotated Image', rotatedImage)
cv2.waitKey(0)
After running the above lines of code, you will have the following output:
Crop an Image
First, we need to import the cv2 module and read the image and extract the width and height of the image:
import cv2
img = cv2.imread("pyimg.jpg")
height, width = img.shape[0:2]
Now get the starting and ending index of the row and column. This will define the size of the newly created image. For example, start from row number 10 till row number 15 will give the height of the image.
Similarly, start from column number 10 until column number 15 will give the width of the image.
You can get the starting point by specifying the percentage value of the total height and the total width. Similarly, to get the ending point of the cropped image, specify the percentage values as below:
startRow = int(height*.15)
startCol = int(width*.15)
endRow = int(height*.85)
endCol = int(width*.85)
Now map these values to the original image. Note that you have to cast the starting and ending values to integers because when mapping, the indexes are always integers.
croppedImage = img[startRow:endRow, startCol:endCol]
Here we specified the range from starting to ending of rows and columns.
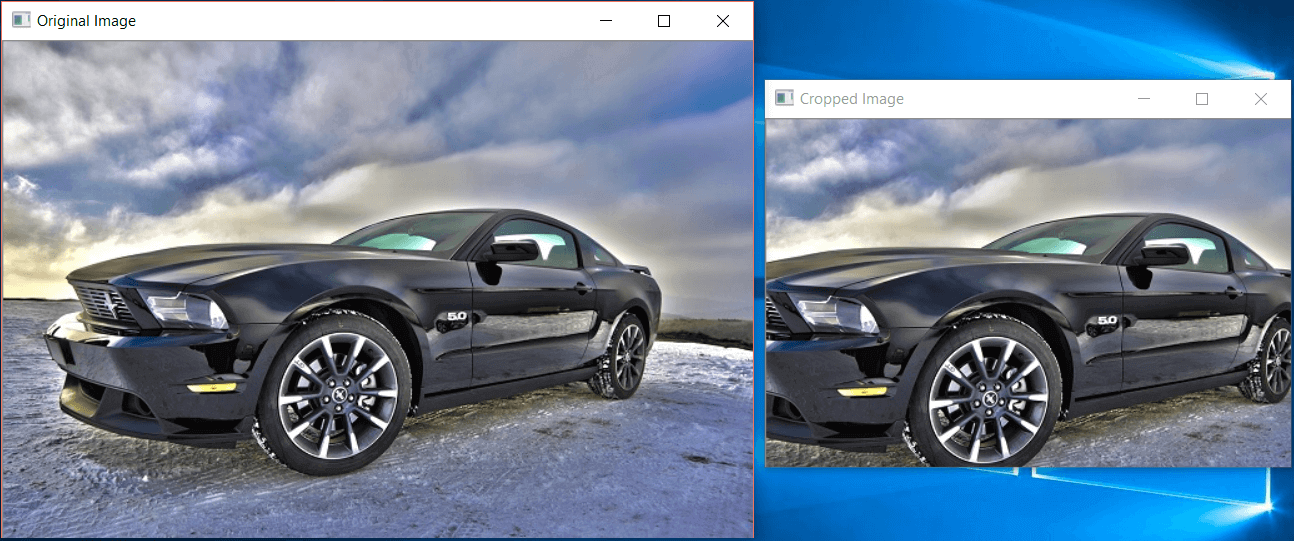
Now display the original and cropped image in the output:
cv2.imshow('Original Image', img)
cv2.imshow('Cropped Image', croppedImage)
cv2.waitKey(0)
The result will be as follows:
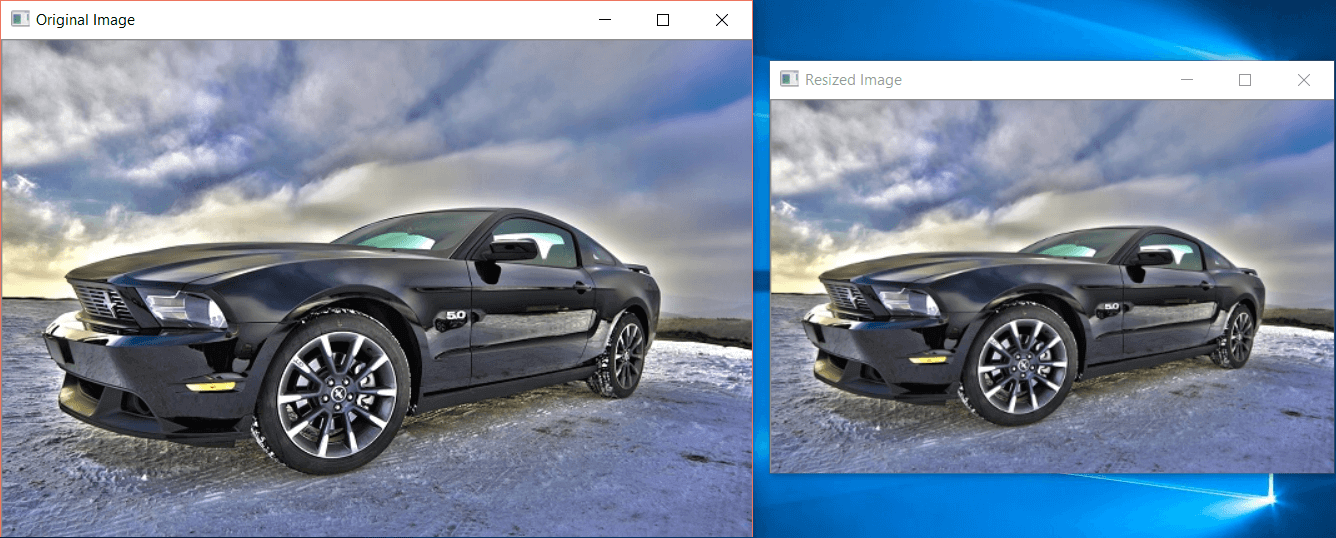
Resize an Image
To resize an image, you can use the resize() method of openCV. In the resize method, you can either specify the values of x and y axis or the number of rows and columns which tells the size of the image.
Import and read the image:
import cv2
img = cv2.imread("pyimg.jpg")
Now using the resize method with axis values:
newImg = cv2.resize(img, (0,0), fx=0.75, fy=0.75)
cv2.imshow('Resized Image', newImg)
cv2.waitKey(0)
The result will be as follows:
Now using the row and column values to resize the image:
newImg = cv2.resize(img, (550, 350))
cv2.imshow('Resized Image', newImg)
cv2.waitKey(0)
We say we want 550 columns (the width) and 350 rows (the height).
The result will be:

Adjust Image Contrast
In Python OpenCV module, there is no particular function to adjust image contrast but the official documentation of OpenCV suggests an equation that can perform image brightness and image contrast both at the same time.
new_img = a * original_img + b
Here a is alpha which defines the contrast of the image. If a is greater than 1, there will be higher contrast.
If the value of a is between 0 and 1 (smaller than 1 but greater than 0), there would be lower contrast. If a is 1, there will be no contrast effect on the image.
b stands for beta. The values of b vary from -127 to +127.
To implement this equation in Python OpenCV, you can use the addWeighted() method. We use The addWeighted() method as it generates the output in the range of 0 and 255 for a 24-bit color image.
The syntax of addWeighted() method is as follows:
cv2.addWeighted(source_img1, alpha1, source_img2, alpha2, beta)
This syntax will blend two images, the first source image (source_img1) with a weight of alpha1 and second source image (source_img2).
If you only want to apply contrast in one image, you can add a second image source as zeros using NumPy.
Let’s work on a simple example. Import the following modules:
import cv2
import numpy as np
Read the original image:
img = cv2.imread("pyimg.jpg")
Now apply the contrast. Since there is no other image, we will use the np.zeros which will create an array of the same shape and data type as the original image but the array will be filled with zeros.
contrast_img = cv2.addWeighted(img, 2.5, np.zeros(img.shape, img.dtype), 0, 0)
cv2.imshow('Original Image', img)
cv2.imshow('Contrast Image', contrast_img)
cv2.waitKey(0)
In the above code, the brightness is set to 0 as we only want to apply contrast.
The comparison of the original and contrast image is as follows:

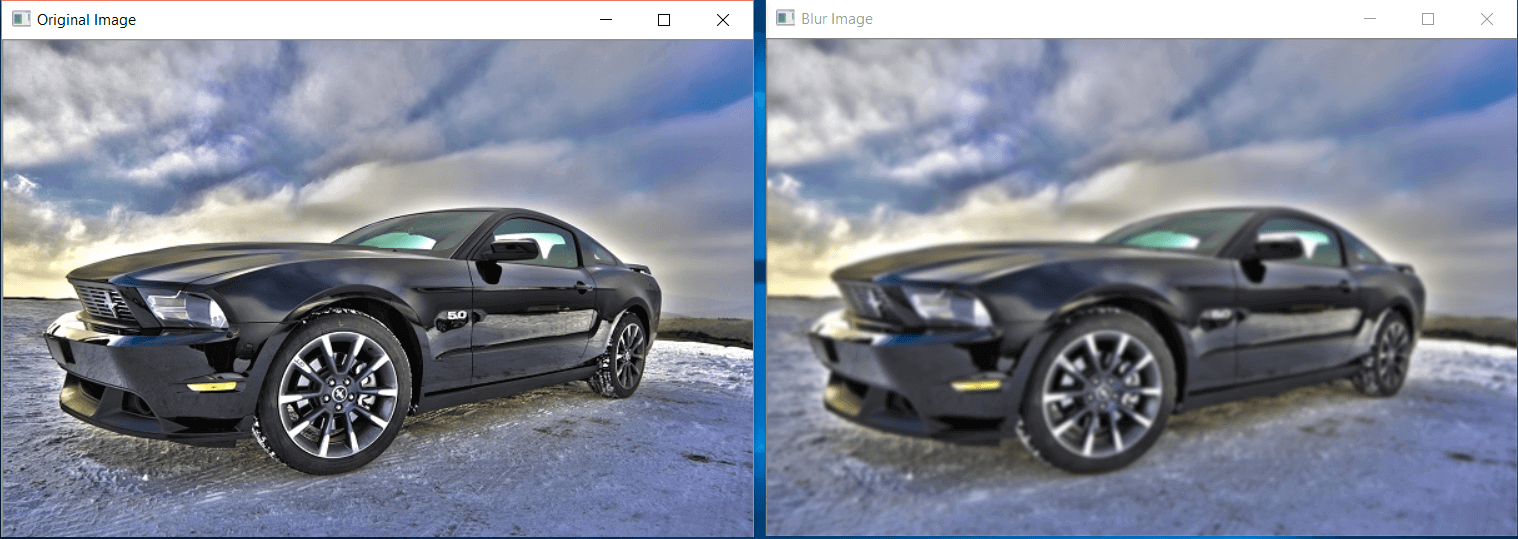
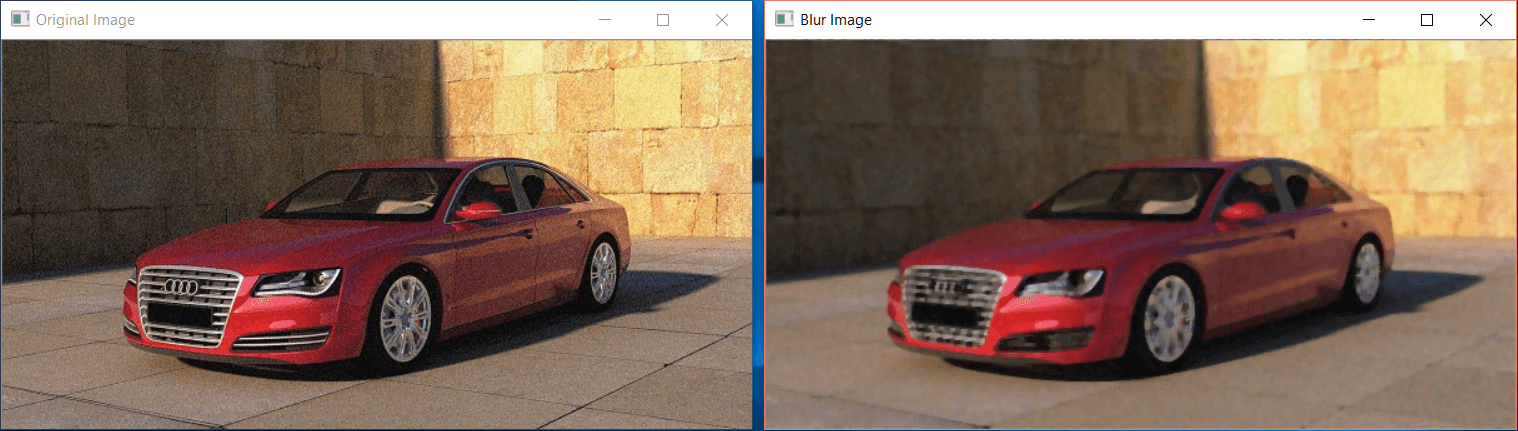
Make an image blurry
Gaussian Blur
To make an image blurry, you can use the GaussianBlur() method of OpenCV.
The GaussianBlur() uses the Gaussian kernel. The height and width of the kernel should be a positive and an odd number.
Then you have to specify the X and Y direction that is sigmaX and sigmaY respectively. If only one is specified, both are considered the same.
Consider the following example:
import cv2
img = cv2.imread("pyimg.jpg")
blur_image = cv2.GaussianBlur(img, (7,7), 0)
cv2.imshow('Original Image', img)
cv2.imshow('Blur Image', blur_image)
cv2.waitKey(0)
In the above snippet, the actual image is passed to GaussianBlur() along with height and width of the kernel and the X and Y directions.
The comparison of the original and blurry image is as follows:
Median Blur
In median blurring, the median of all the pixels of the image is calculated inside the kernel area. The central value is then replaced with the resultant median value. Median blurring is used when there are salt and pepper noise in the image.
To apply median blurring, you can use the medianBlur() method of OpenCV.
Consider the following example where we have a salt and pepper noise in the image:
import cv2
img = cv2.imread("pynoise.png")
blur_image = cv2.medianBlur(img,5)
This will apply 50% noise in the image along with median blur. Now show the images:
cv2.imshow('Original Image', img)
cv2.imshow('Blur Image', blur_image)
cv2.waitKey(0)
The result will be like the following:
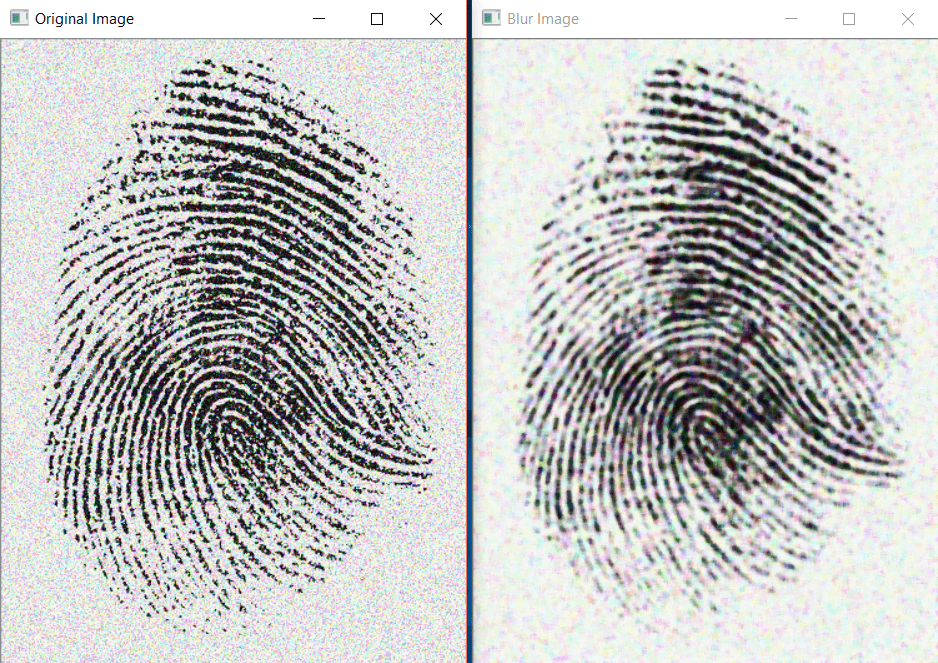
Another comparison of the original image and after blurring:
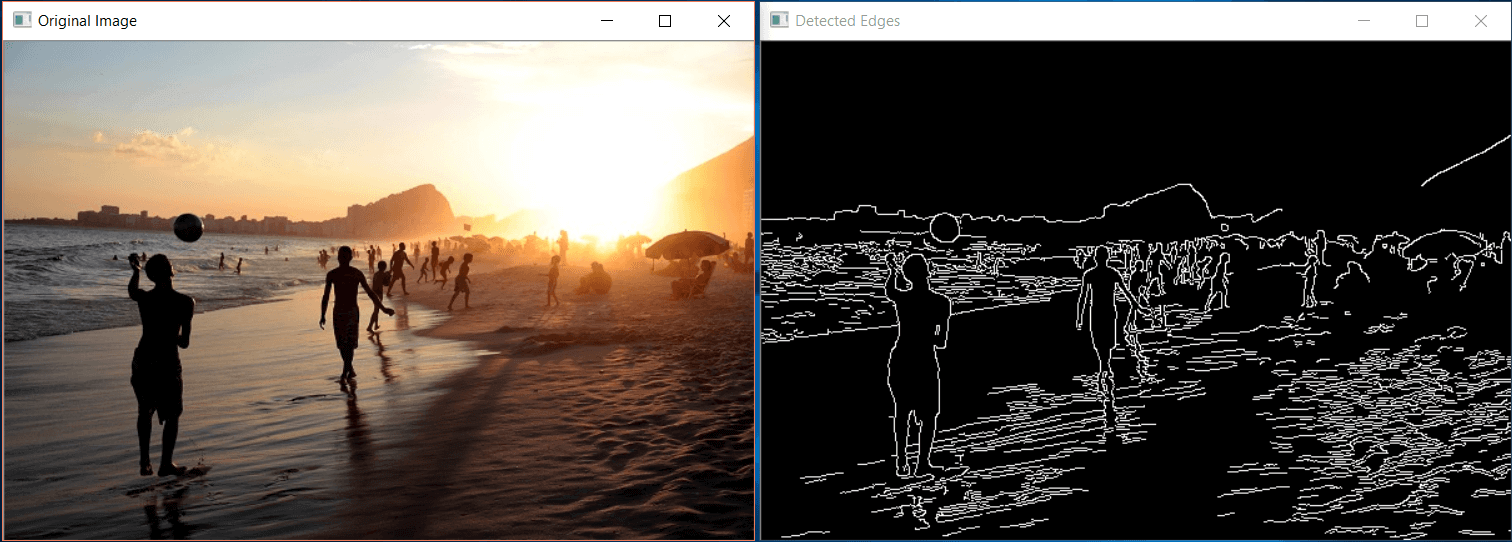
Detect Edges
To detect the edges in an image, you can use the Canny() method of cv2 which implements the Canny edge detector. The Canny edge detector is also known as the optimal detector.
The syntax to Canny() is as follows:
cv2.Canny(image, minVal, maxVal)
Here minVal and maxVal are the minimum and maximum intensity gradient values respectively.
Consider the following code:
import cv2
img = cv2.imread("pyimg.jpg")
edge_img = cv2.Canny(img,100,200)
cv2.imshow("Detected Edges", edge_img)
cv2.waitKey(0)
The output will be the following:
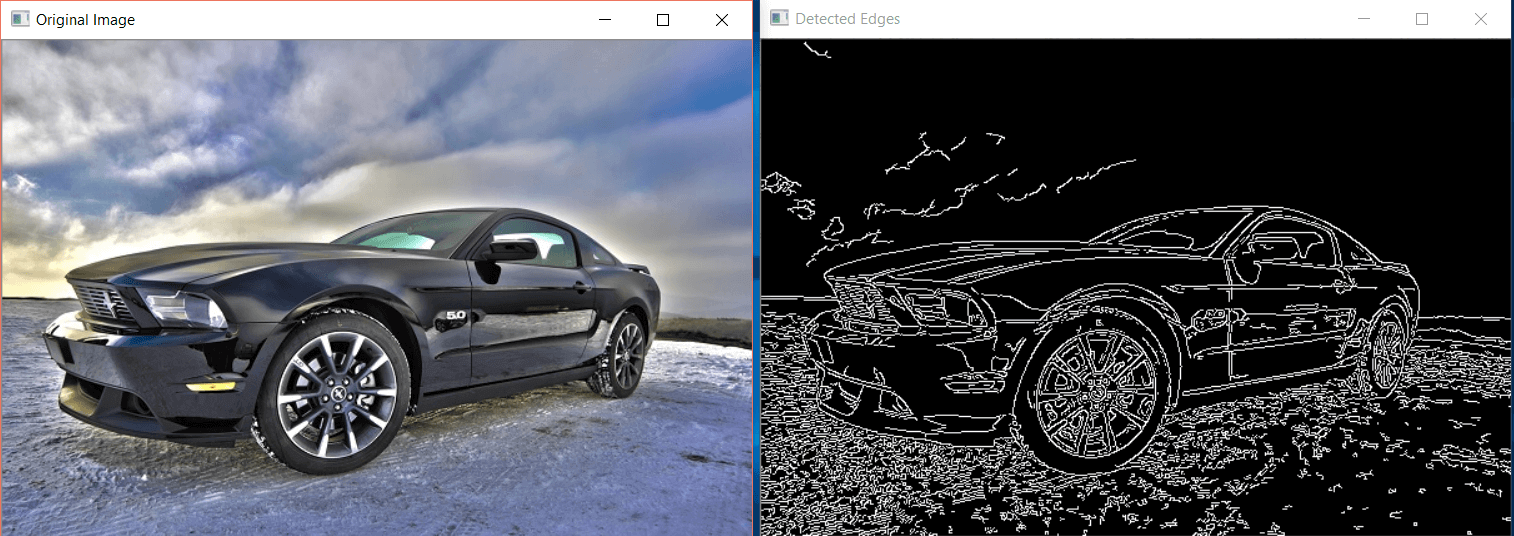
Here is the result of the above code on another image:
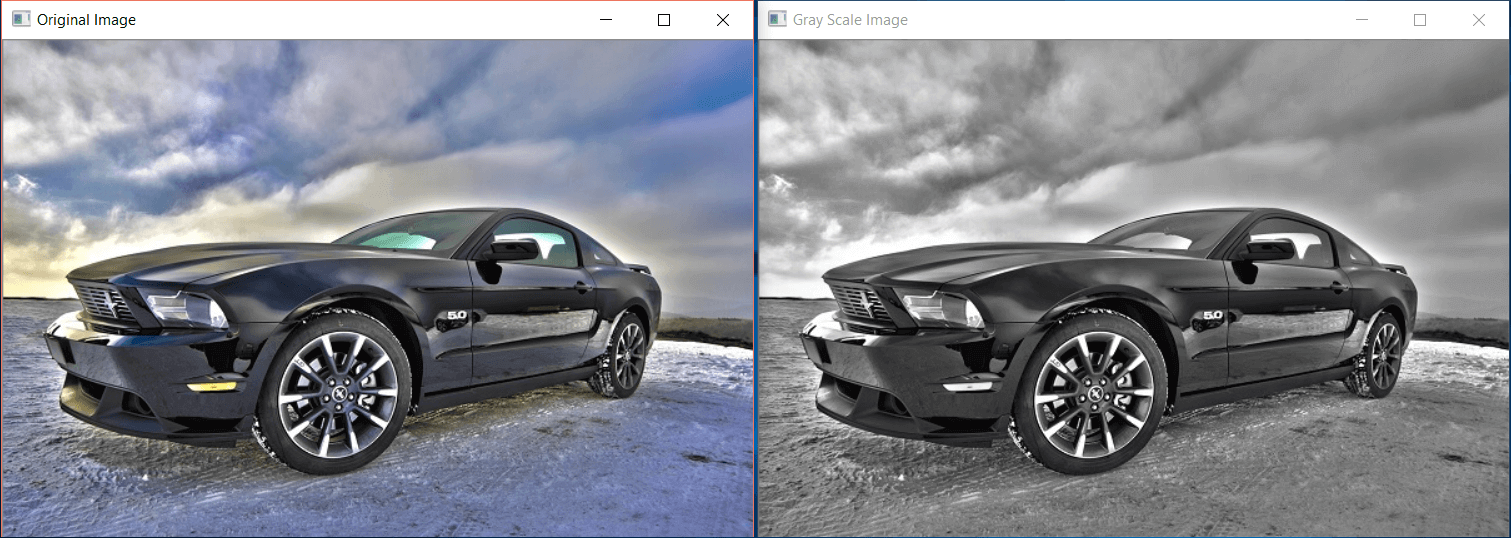
Convert image to grayscale (Black & White)
The easy way to convert an image in grayscale is to load it like this:
img = cv2.imread("pyimg.jpg", 0)
There is another method using BGR2GRAY.
To convert a color image into a grayscale image, use the BGR2GRAY attribute of the cv2 module. This is demonstrated in the example below:
Import the cv2 module:
import cv2
Read the image:
img = cv2.imread("pyimg.jpg")
Use the cvtColor() method of the cv2 module which takes the original image and the COLOR_BGR2GRAY attribute as an argument. Store the resultant image in a variable:
gray_img = cv2.cvtColor(img, cv2.COLOR_BGR2GRAY)
Display the original and grayscale images:
cv2.imshow("Original Image", img)
cv2.imshow("Gray Scale Image", gray_img)
cv2.waitKey(0)
The output will be as follows:
Centroid (Center of blob) detection
To find the center of an image, the first step is to convert the original image into grayscale. We can use the cvtColor() method of cv2 as we did before.
This is demonstrated in the following code:
import cv2
img = cv2.imread("py.jpg")
gray_img = cv2.cvtColor(img, cv2.COLOR_BGR2GRAY)
We read the image and convert it to a grayscale image. The new image is stored in gray_img.
Now we have to calculate the moments of the image. Use the moments() method of cv2. In the moments() method, the grayscale image will be passed as below:
moment = cv2.moments(gray_img)
Then we need to calculate the x and y coordinates of the center of the image by using the moments that we got above:
X = int(moment ["m10"] / moment["m00"])
Y = int(moment ["m01"] / moment["m00"])
Finally, we have the center of the image. To highlight this center position, we can use the circle method which will create a circle in the given coordinates of the given radius.
The circle() method takes the img, the x and y coordinates where the circle will be created, the size, the color that we want the circle to be and the thickness.
cv2.circle(img, (X, Y), 15, (205, 114, 101), 1)
The circle is created on the image.
cv2.imshow("Center of the Image", img)
cv2.waitKey(0)
The original image is:
After detecting the center, our image will be as follows:

Extracting text from Image (OCR)
To extract text from an image, you can use Google Tesseract-OCR. You can download it from this link
Then you should install the pytesseract module which is a Python wrapper for Tesseract-OCR.
pip install pytesseract
The image from which we will extract the text from is as follows:
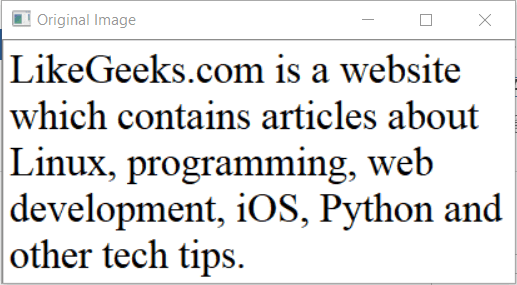
Now let’s convert the text in this image to a string of characters and display the text as a string on output:
Import the pytesseract module:
import pytesseract
Set the path of the Tesseract-OCR executable file:
pytesseract.pytesseract.tesseract_cmd = r'C:\Program Files (x86)\Tesseract-OCR\tesseract'
Now use the image_to_string method to convert the image into a string:
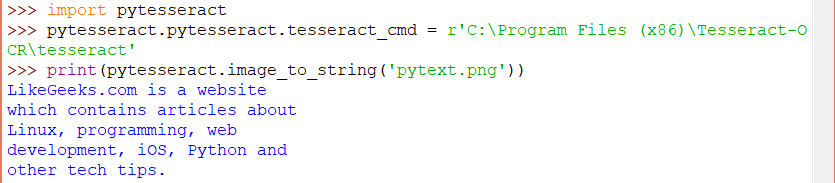
print(pytesseract.image_to_string('pytext.png'))
The output will be as follows:
Works like charm!
Detect and correct text skew
In this section, we will correct the text skew.
The original image is as follows:

Import the modules cv2, NumPy and read the image:
import cv2
import numpy as np
img = cv2.imread("pytext1.png")
Convert the image into a grayscale image:
gray_img=cv2.cvtColor(img, cv2.COLOR_BGR2GRAY)
Invert the grayscale image using bitwise_not:
gray_img=cv2.bitwise_not(gray_img)
Select the x and y coordinates of the pixels greater than zero by using the column_stack method of NumPy:
coordinates = np.column_stack(np.where(gray_img > 0))
Now we have to calculate the skew angle. We will use the minAreaRect() method of cv2 which returns an angle range from -90 to 0 degrees (where 0 is not included).
ang=cv2.minAreaRect(coordinates)[-1]
The rotated angle of the text region will be stored in the ang variable. Now we add a condition for the angle; if the text region’s angle is smaller than -45, we will add a 90 degrees else we will multiply the angle with a minus to make the angle positive.
if ang<-45:
	ang=-(90+ang)
else:
	ang=-ang
Calculate the center of the text region:
height, width = img.shape[:2]
center_img = (width / 2, height / 2)
Now we have the angle of text skew, we will apply the getRotationMatrix2D() to get the rotation matrix then we will use the wrapAffine() method to rotate the angle (explained earlier).
rotationMatrix = cv2.getRotationMatrix2D(center, angle, 1.0)

rotated_img = cv2.warpAffine(img, rotationMatrix, (width, height), borderMode = cv2.BORDER_REFLECT)
Display the rotated image:
cv2.imshow("Rotated Image", rotated_img)

cv2.waitKey(0)

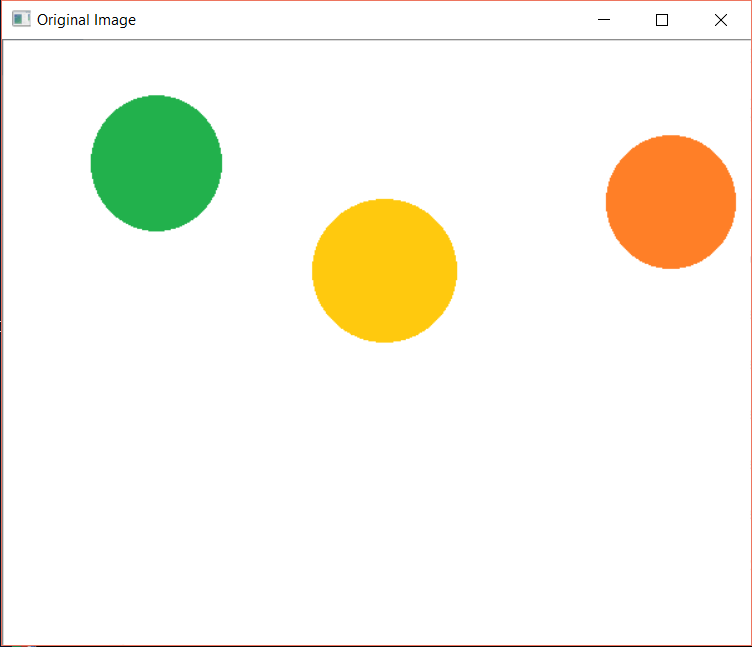
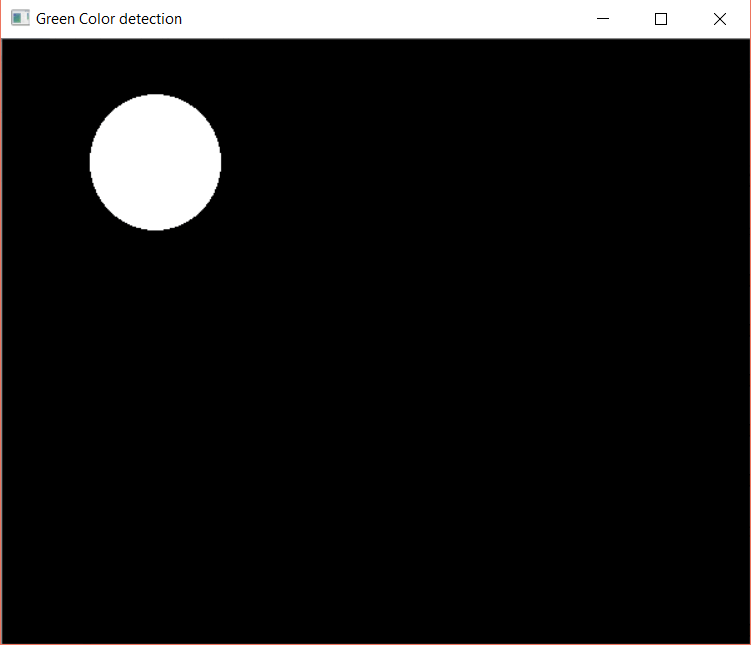
Color Detection
Let’s detect the green color from an image:
Import the modules cv2 for images and NumPy for image arrays:
import cv2
import numpy as np
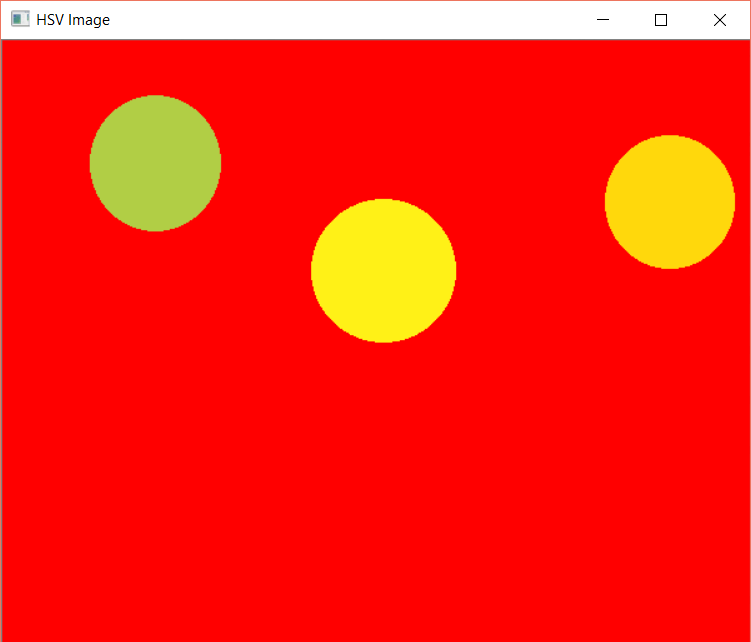
Read the image and convert it into HSV using cvtColor():
img = cv2.imread("pydetect.png")
hsv_img = cv2.cvtColor(img, cv2.COLOR_BGR2HSV)
Display the image:
cv2.imshow("HSV Image", hsv_img)
Now create a NumPy array for the lower green values and the upper green values:
lower_green = np.array([34, 177, 76])
upper_green = np.array([255, 255, 255])
Use the inRange() method of cv2 to check if the given image array elements lie between array values of upper and lower boundaries:
masking = cv2.inRange(hsv_img, lower_green, upper_green)
This will detect the green color.
Finally, display the original and resultant images:
cv2.imshow("Original Image", img)
cv2.imshow("Green Color detection", masking)
cv2.waitKey(0)
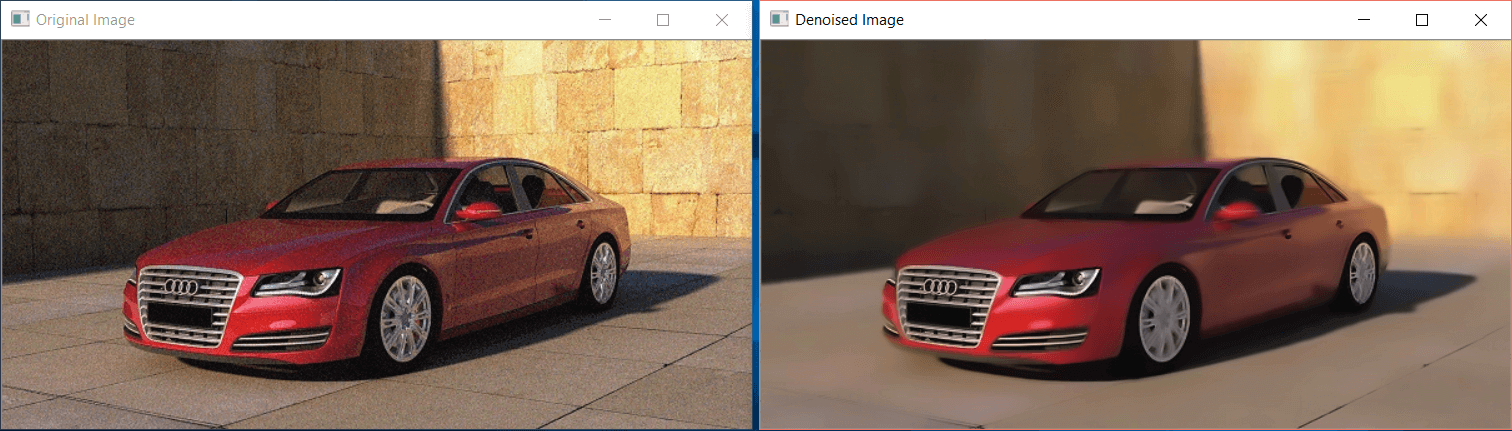
Reduce Noise
To reduce noise from an image, OpenCV provides the following methods:
- fastNlMeansDenoising(): Removes noise from a grayscale image
- fastNlMeansDenoisingColored(): Removes noise from a colored image
- fastNlMeansDenoisingMulti(): Removes noise from grayscale image frames (a grayscale video)
- fastNlMeansDenoisingColoredMulti(): Same as 3 but works with colored frames
Let’s use fastNlMeansDenoisingColored() in our example:
Import the cv2 module and read the image:
import cv2
img = cv2.imread("pyn1.png")
Apply the denoising function which takes respectively the original image (src), the destination (which we have kept none as we are storing the resultant), the filter strength, the image value to remove the colored noise (usually equal to filter strength or 10), the template patch size in pixel to compute weights which should always be odd (recommended size equals 7) and the window size in pixels to compute average of the given pixel.
result = cv2.fastNlMeansDenoisingColored(img,None,20,10,7,21)
Display original and denoised image:
cv2.imshow("Original Image", img)
cv2.imshow("Denoised Image", result)
cv2.waitKey(0)
The output will be:
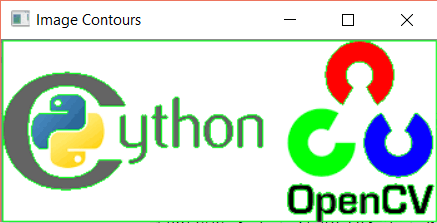
Get image contour
Contours are the curves in an image that are joint together. The curves join the continuous points in an image. The purpose of contours is used to detect the objects.
The original image of which we are getting the contours of is given below:

Consider the following code where we used the findContours() method to find the contours in the image:
Import cv2 module:
import cv2
Read the image and convert it to a grayscale image:
img = cv2.imread('py1.jpg')
gray_img = cv2.cvtColor(img, cv2.COLOR_BGR2GRAY)
Find the threshold:
retval, thresh = cv2.threshold(gray_img, 127, 255, 0)
Use the findContours() which takes the image (we passed threshold here) and some attributes. See findContours() Official.
img_contours, _ = cv2.findContours(thresh, cv2.RETR_TREE, cv2.CHAIN_APPROX_SIMPLE)
Draw the contours on the image using drawContours() method:
cv2.drawContours(img, img_contours, -1, (0, 255, 0))
Display the image:
cv2.imshow('Image Contours', img)
cv2.waitKey(0)
The result will be:
Remove Background from an image
To remove the background from an image, we will find the contours to detect edges of the main object and create a mask with np.zeros for the background and then combine the mask and the image using the bitwise_and operator.
Consider the example below:
Import the modules (NumPy and cv2):
import cv2
import numpy as np
Read the image and convert the image into a grayscale image:
img = cv2.imread("py.jpg")

gray_img = cv2.cvtColor(img, cv2.COLOR_BGR2GRAY)
Find the threshold:
_, thresh = cv2.threshold(gray_img, 127, 255, cv2.THRESH_BINARY_INV + cv2.THRESH_OTSU)
In the threshold() method, the last argument defines the style of the threshold. See Official documentation of OpenCV threshold.
Find the image contours:
img_contours = cv2.findContours(thresh, cv2.RETR_TREE, cv2.CHAIN_APPROX_SIMPLE)[-2]
Sort the contours:
img_contours = sorted(img_contours, key=cv2.contourArea)
for i in img_contours:
    if cv2.contourArea(i) > 100:
        break
Generate the mask using np.zeros:
mask = np.zeros(img.shape[:2], np.uint8)
Draw contours:
cv2.drawContours(mask, [i],-1, 255, -1)
Apply the bitwise_and operator:
new_img = cv2.bitwise_and(img, img, mask=mask)
Display the original image:
cv2.imshow("Original Image", img)
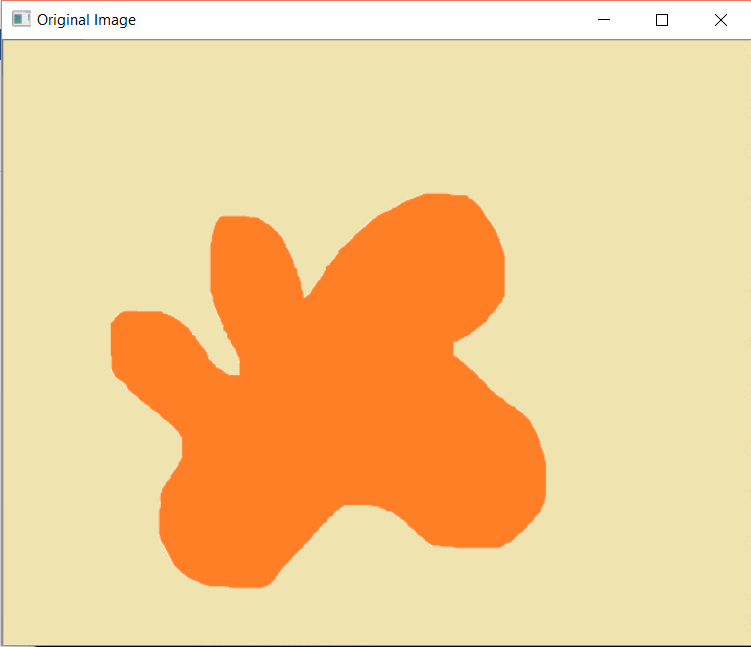
Display the resultant image:
cv2.imshow("Image with background removed", new_img)
cv2.waitKey(0)
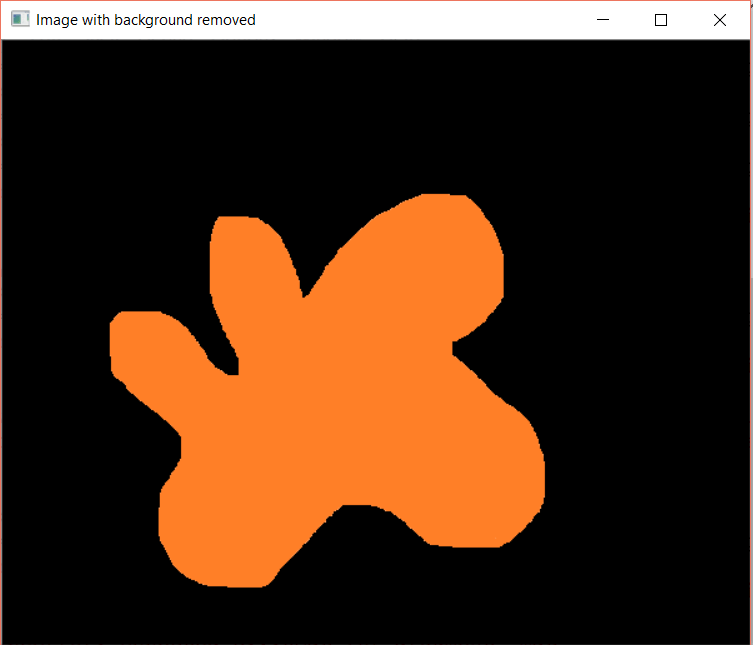
Image processing is fun when using OpenCV as you saw. I hope you find the tutorial useful. Keep coming back.
Thank you.
Mokhtar is the founder of LikeGeeks.com. He is a seasoned technologist and accomplished author, with expertise in Linux system administration and Python development. Since 2010, Mokhtar has built an impressive career, transitioning from system administration to Python development in 2015. His work spans large corporations to freelance clients around the globe. Alongside his technical work, Mokhtar has authored some insightful books in his field. Known for his innovative solutions, meticulous attention to detail, and high-quality work, Mokhtar continually seeks new challenges within the dynamic field of technology.
Hi loved the content.
Can you tell me if I want a specific text to be cleared from an image or to place a mask over that area how can I achieve this?
Any guide would be great.
Thanks!
Regards
Thanks a lot!
You can use pytesseract to extract text as described in the article, then you can apply any mask you want on the area that contains any occurrence of the extracted text.
Hope that helps!
i get black background without the object of interest in the output for the new image
Maybe you should adjust your values and colors to fit your image.
This article was really helpful for my work.Thankyou
Great to hear that! Good luck!
Can you also write about image,text,handwritten text segmentation techniques.
I’ll try to write about these points.
img_contours = cv2.findContours(threshed, cv2.RETR_TREE, cv2.CHAIN_APPROX_SIMPLE)[-2]
but treshed is undifined so it work if you remplace it by tresh:
img_contours = cv2.findContours(thresh, cv2.RETR_TREE, cv2.CHAIN_APPROX_SIMPLE)[-2]
That’s right. Thanks for the correction.
This is really fascinating.
Thanks a lot.
Hey Mokhtart,
Could you share the code for these examples please?
Thanks
Hi Ardit,
Every example has its own code. There is no example without code.
Hola,
Si desea capturar una imagen de su transmisión o cámara, puede usar el siguiente código:
import cv2vid = cv2.VideoCapture(0)
image = vid.read()
while(True):
cv2.imshow('img1',image)
if cv2.waitKey(1) & 0xFF == ord('y'):
cv2.imwrite('img.png',image)
cv2.destroyAllWindows()
break
vid.release()
Saludos,