MySQL on Linux (Beginners Tutorial)
In this post, we will cover many aspects of MySQL on Linux. First of all, how to install it, how to perform basic CRUD operations, how to import & export data, play with the MySQL engine itself such as setting the root user password, and much more.
MySQL is one of the most popular relational database engines in the world. It has earned its fame for being open source and quite stable.
It is also compatible with most known programming languages. Of course, it’s possible to install it and use it on most Linux distributions that exist, for example, Ubuntu and CentOS. Let’s start.
- 1 Install MySQL on Linux Ubuntu and CentOS
- 2 Check if MySQL is installed
- 3 Where does MySQL installed on Linux?
- 4 Where is the MySQL configuration file (my.cnf)?
- 5 Start MySQL & enable on startup
- 6 Check if MySQL is running
- 7 Check which port MySQL is running
- 8 Restart MySQL
- 9 Set root password for MySQL
- 10 Check MySQL version
- 11 Create a user on MySQL
- 12 Grant all privileges
- 13 List all MySQL databases
- 14 Create a MySQL table
- 15 CRUD operations
- 16 Import SQL file
- 17 Export database
- 18 Backup database
- 19 Make MySQL case insensitive
- 20 Where are MySQL logs on Linux?
- 21 Uninstall MySQL
- 22 Conclusion
Install MySQL on Linux Ubuntu and CentOS
The first step to use MySQL on Linux is obviously to install it in our system.
Ubuntu and CentOS are two of the most used Linux distributions. In the case of Ubuntu, it is quite popular among novices who come from other operating systems like Windows.
Recently, Canonical, the company behind the development of Ubuntu, has been profiling Ubuntu to be used on servers.
On the other hand, CentOS was born as a clone of Red Hat Enterprise Linux, and it has always been used in the servers area as its main objective.
So if you use Ubuntu, you can install MySQL by typing this command in a terminal session:
$ sudo apt install mysql-server
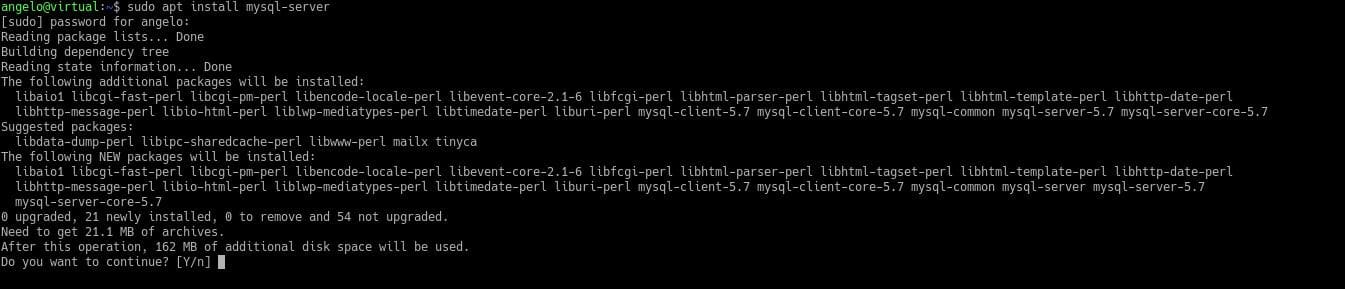
Then, after typing the user’s password, it will start the download and subsequent installation.
On the other hand, CentOS does not include MySQL by default in its repositories. However, it is easy to add the MySQL repository to install it. First, switch to the root user and then add the repository.
$ su

$ yum install https://dev.mysql.com/get/mysql80-community-release-el7-2.noarch.rpm
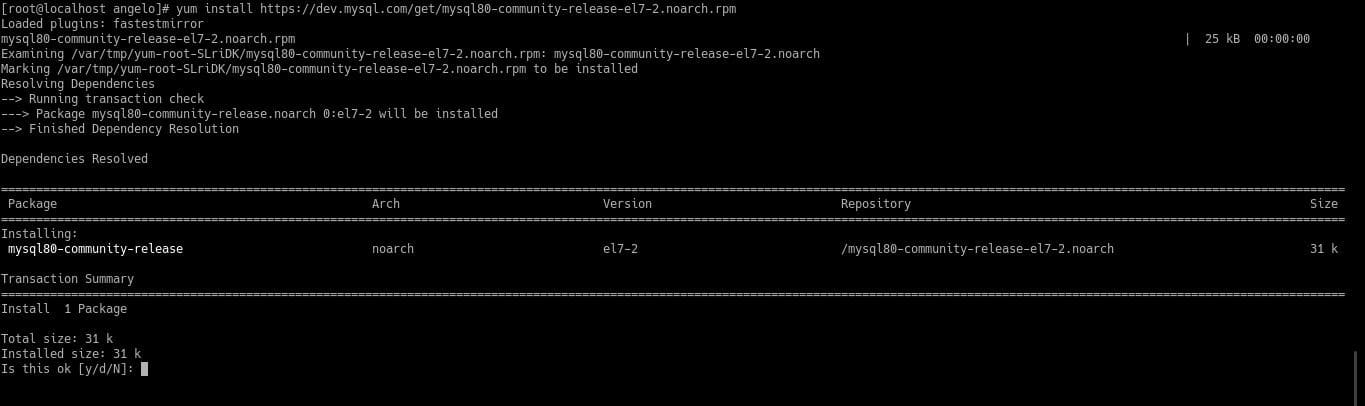
Type Y to start the process.
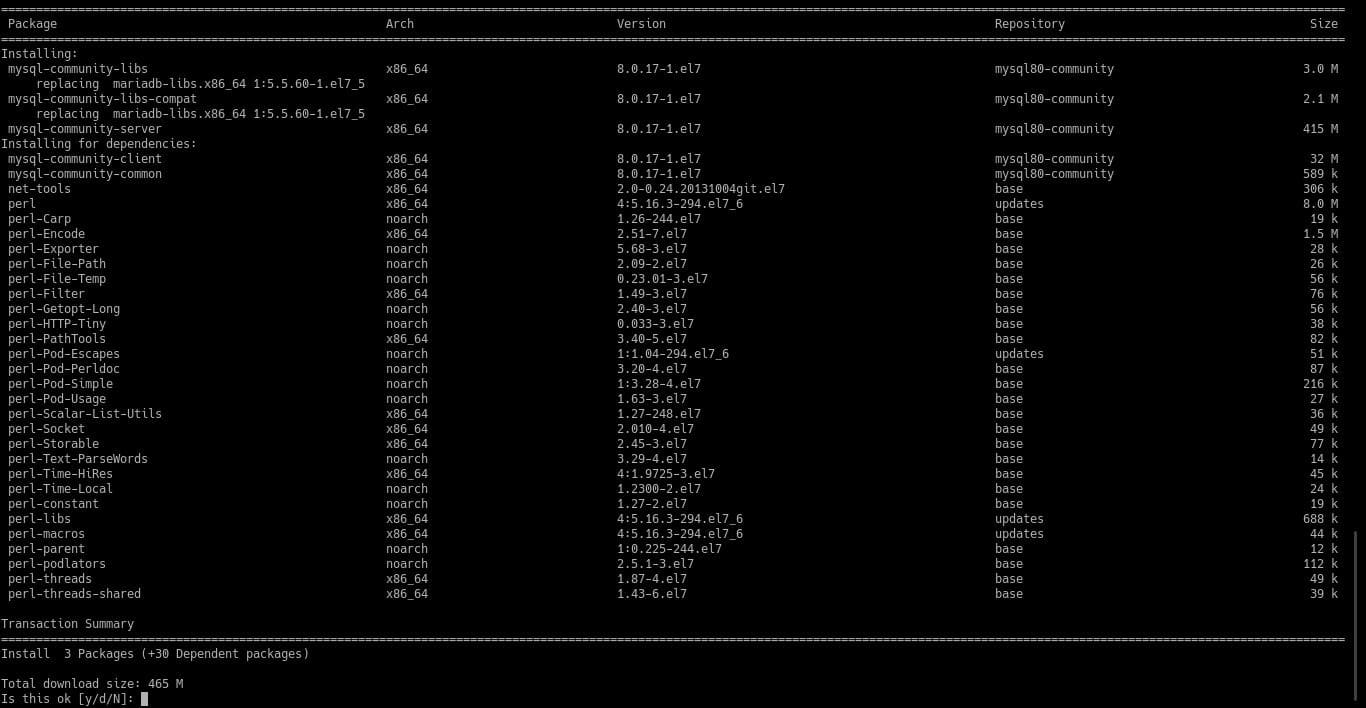
Now, you can install MySQL on CentOS. Just type the following command:
$ yum install mysql-community-server
Check if MySQL is installed
It is possible that during the installation on both systems that something went wrong. So it is a good idea to check if MySQL is installed or not.
On both systems (Ubuntu & CentOS), if you want to check if MySQL is correctly installed, you can show the version its version using the following command:
$ mysql --version

By showing the current version of MySQL, that means MySQL is correctly installed and ready to use.
Where does MySQL installed on Linux?
Generally, each Linux distribution has its way of unpacking each of the programs we install. However, Linux has some conventions.
Normally, MySQL binaries are in the following locations:
/usr/bin
On the other hand, it is good to know where the databases are stored in the system. Normally the location is as follows:
/var/lib/mysql/
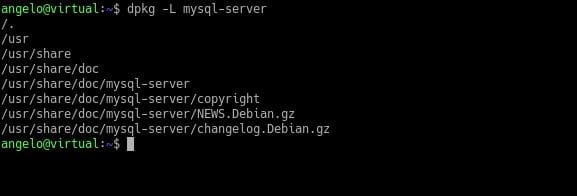
Finally, if you want to know where all the installed MySQL files are located, you can run the following command:
For Ubuntu:
$ dpkg -L mysql-server
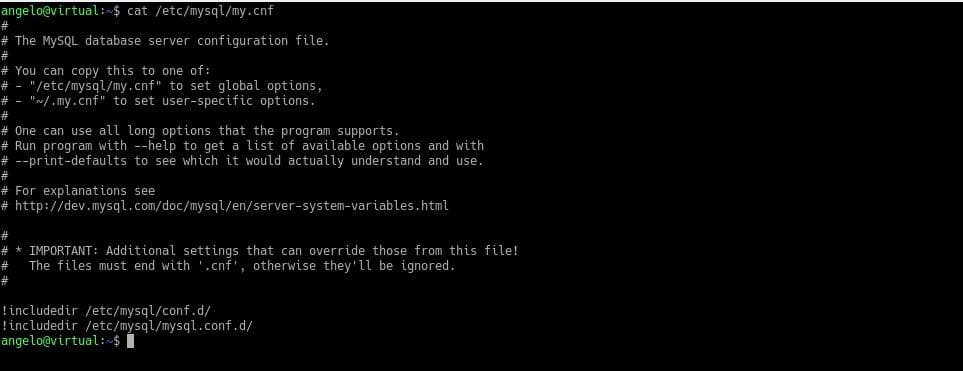
Where is the MySQL configuration file (my.cnf)?
MySQL runs as a system service. In Unix family systems, services are configured through text files. The my.cnf file is the file where all MySQL configurations are defined.
If you use Ubuntu, you can find the MySQL configuration file in the following path:
/etc/mysql/my.cnf
On the other hand, if you use CentOS, the path is as follows:
/etc/my.cnf
One thing to keep in mind is that the configuration file may include other configuration files. This is to separate the configurations and make them more understandable.
If you want to see its content, you can use the cat command:
$ cat /etc/mysql/my.cnf
You can edit its content using a text editor such as nano or vim. In the case of Ubuntu, most of the configurations are in
/etc/mysql/conf.d/
Remember that if you are going to edit it, create a backup of the file first.
Start MySQL & enable on startup
Now MySQL is installed but still not running. So how to start MySQL?
Since previous versions of Linux, the systemd is in charge of managing the system services. As we may already know, MySQL is a system service.
To start running the MySQL service, type the following command in the terminal:
$ sudo systemctl start mysql
If you are using CentOS, use this command as the root user:
$ systemctl start mysqld

As we can see, no output. That means the service started successfully.
If you reboot the system, you will notice that MySQL is not running. So we need to enable it to run on system startup.
To do this, use the systemctl command but add the enable option:
$ sudo systemctl enable mysql
In the case you are using CentOS:
$ systemctl enable mysqld

Now, if you reboot the system, you will note that MySQL is running. Let’s see how to ensure that.
Check if MySQL is running
You can check if MySQL is running or not using the systemctl command but adding the status option:
$ sudo systemctl status mysql
For CentOS, the command should run as root user and as follows:
$ systemctl status mysqld
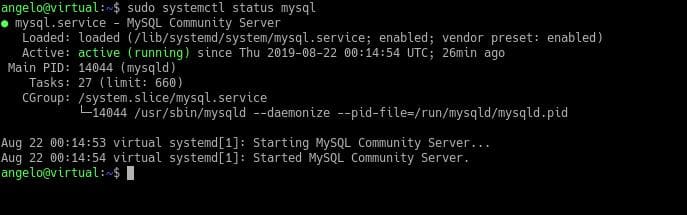
The command generates a screen output with a green signal indicating that the service is running.
Otherwise, it appears in gray, indicating that it is inactive or stopped.
Check which port MySQL is running
An important part of managing MySQL service is knowing which port the instance is running on. By default, the port used by MySQL is 3306. However, it is always advisable to check before starting work.
To check which port is used by MySQL on Linux, you can use one of these two commands:
$ lsof -n | grep 'mysql.*TCP'
Or, you can use this one too:
$ netstat -tlpn | grep mysql

Anyway, it is pretty useful to know which port is used by MySQL in order to open that port in case you are using a firewall like iptables or CSF firewall.
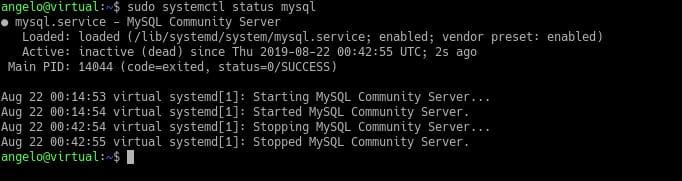
Restart MySQL
If you make any changes to MySQL settings, they will not become effective until you reboot MySQL or restart the MySQL service.
To restart MySQL just use the following command:
$ sudo systemctl restart mysql
For CentOS use this one as the root user:
$ systemctl restart mysqld

If the command does not generate any screen output, it means that the service was successfully restarted.
Set root password for MySQL
The MySQL root user is the one who has all the privileges over all databases. So it is a must to define a very strong password for this user.
Some of the operations that the root user can do:
- Create new users.
- Manage the permissions of users.
To do this, we will use the mysql_secure_installation script, where we can not only define the password of the root user, but we can also add other configurations.
So, in Ubuntu, run the following command to use the mysql_secure_installation script.
$ sudo mysql_secure_installation
On CentOS, the command is the same but run it as the root user.
$ mysql_secure_installation
There the first question will be about to activate the Validate Password plugin. It is a good idea to enable it. Then, choose the level of a password validation policy.
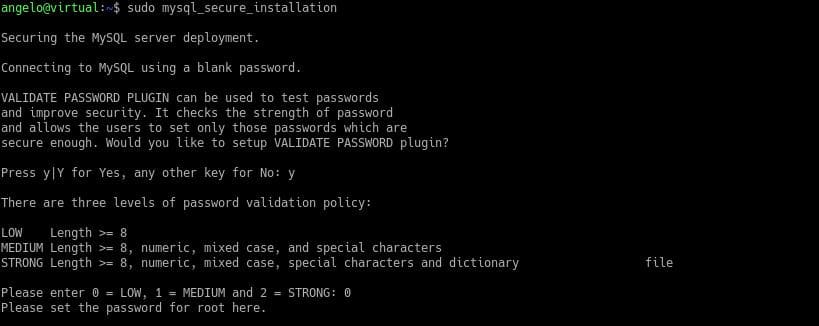
Next, we can set the root user password:
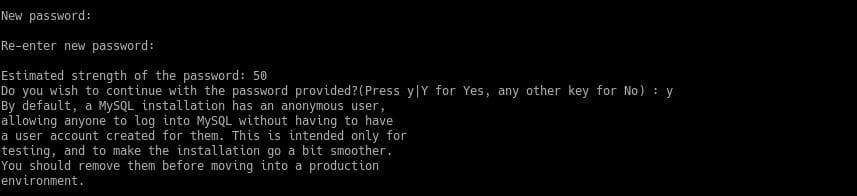
After that, the plugin will evaluate the strength of the password. Type Y to continue.
Then, it will ask for other configuration questions that you have to answer. The answers depend on each particular case.
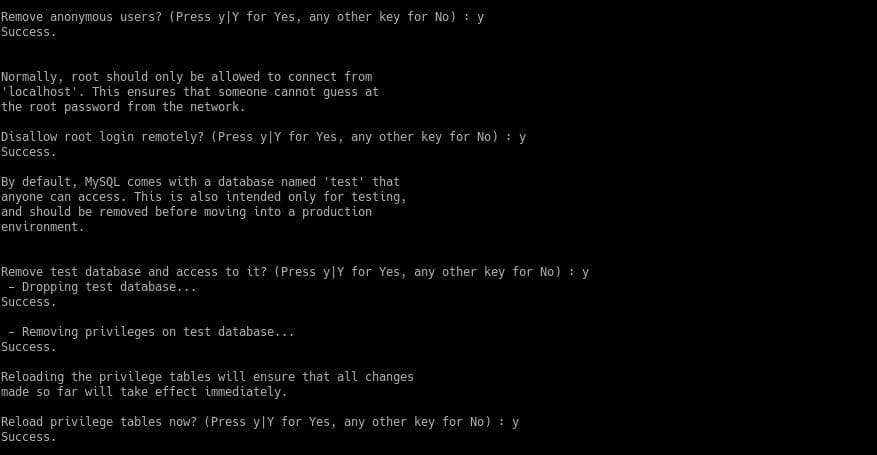
Congratulations! The root password has been correctly defined.
Check MySQL version
MySQL is an application with quite active development. Besides this, the large Linux distributions constantly send security patches. So it is good to know which version of MySQL is installed.
On the other hand, on the internet, they often make publications about discovered security vulnerabilities and which versions are affected.
By knowing which version we have, we will be able to know if we have any vulnerabilities and take precautions.
To do this, simply run the following command:
$ mysql --version

There you can see the current version that is installed so that you can update it or keep it according to our needs.
Create a user on MySQL
Working with MySQL is a delicate matter, not because of the complexity of the service itself, but because of the security policies, we have to implement to protect the data.
A basic security policy is to create specific users for each application or database.
To do this, you have to first access the MySQL shell as the root user:
$ sudo mysql -u root -p
On CentOS:
$ mysql -u root -p
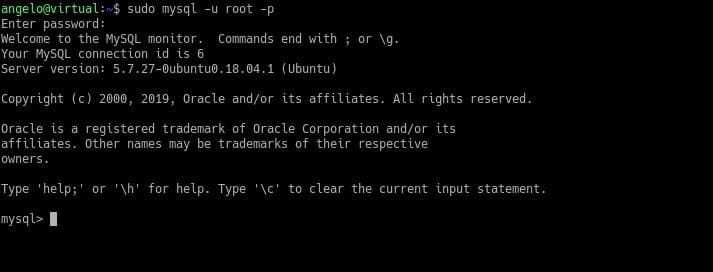
When you run the command, you will be asked for the MySQL root user password. Then, you will be able to use MySQL commands.
To create a new user run the following sentence:
> CREATE USER 'user'@'localhost' IDENTIFIED BY 'password';

Replace ‘user’ with the username of your choice. ‘localhost’ is the host where you will create the user. And in ‘password’ enter the password for this new user. Similarly, it is recommended that it be a strong password.
Grant all privileges
The newly created user does not have any privilege on any database. In fact, you would not be able to access the MySQL shell either. Then, the root user has to grant certain privileges to this new user.
There are several privileges, and their assignment will depend on the server administrator. Some of them are:
- ALL PRIVILEGES: Assigns all permissions on the chosen database.
- CREATE: This privilege allows you to create new tables or databases.
- DROP: In this case, it allows you to delete tables and databases.
- DELETE: It allows deleting records from the tables.
- INSERT: With this privilege, you can create records in the tables.
- SELECT: This privilege is required to read the records from the tables.
- UPDATE: It allows you to update the records of a table.
- GRANT OPTION: With this privilege, the user can remove privileges from certain users.
The syntax for granting a privilege is as follows:
> GRANT [privilege1, privilege2] ON [database].[table] TO '[user]'@'localhost';
For example:
> GRANT CREATE ON test.* TO 'user'@'localhost';

In this case, the user can only create tables in the database called test.
On the contrary, if you want to grant all permissions on all tables in a single call for the test database, the best option is ALL PRIVILEGES. This is an example:
> GRANT ALL PRIVILEGES ON test.* TO 'user'@'localhost';
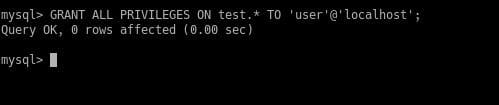
In this way, privileges are assigned to a user in MySQL.
List all MySQL databases
Over time, our MySQL instance will be replete with many databases. Then, it is better at some point to list them all.
To do this, access the MySQL console with the following command as the root user or using sudo:
$ sudo mysql -u root -p
Once we entered the MySQL console, just use the following command to list all existing databases:
> SHOW DATABASES;
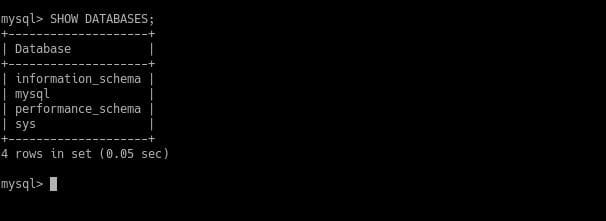
In the screen output, we can see all the databases.
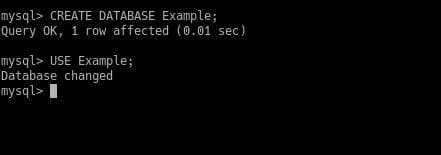
Create a MySQL table
One of the most basic operations when creating a new MySQL instance is to create a table.
However, to create a table, we have to create a database.
Once we have entered the MySQL console, we create the database with the following command:
> CREATE DATABASE [database_name];
Then, we need to select the newly created database.
> USE [database_name];
In this case, I will create a database called “Example”.
Now we can create the table. The basic MySQL syntax to create a table is the following:
> CREATE TABLE [table_name] (column1_name data_type(length) [NOT NULL] [DEFAULT value] [AUTO_INCREMENT], column2_name data_type(length) [NOT NULL] [DEFAULT value] [AUTO_INCREMENT] ... );
In the following example, I will create a table called “Person” with three columns. The first one will be “Id” that will be of integer type of length ten that cannot be null.
Generally, the first column is the one dedicated to the Primary Key. Besides, the options in [] are optional.
The second column will be “name” that will be varchar of length ten, and the last column will be “last_name” that will also be varchar of length 10.
> CREATE TABLE Person (Id int(10) NOT NULL, name varchar(10), last_name varchar(10));

Awesome! You just created a MySQL table. However, the table is empty since it’s just created, and there is no data inserted yet. Now let’s see how to insert data into that table.
CRUD operations
CRUD operations to a database table are other very basic data manipulation operations. So, we need to learn how to do them.
CRUD stands for:
C: Create a table.
R: Read data from the database.
U: Update database.
D: Delete data from the database.
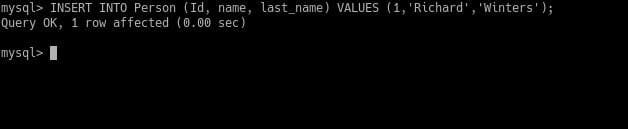
Create a new record (Insert)
Once the table is created, it is time to insert records into it. To do this, it is necessary to know which types the columns of the table are.
For this example, we will use the same table that we have created before. The basic syntax to create a record with the insert statement is as the following:
> INSERT INTO table_name (column1, column2, column3,..) VALUES ( value1, value2, value3,..);
So, it would be something like this:
> INSERT INTO Person (Id, name, last_name) VALUES (1,'Richard','Winters');
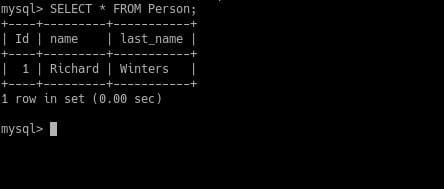
Read data from the Table (Select)
Once the data has been saved, it is time to read it. The statement is select. The basic syntax is as follows:
> SELECT column1, column2, ... FROM table_name;
If you want to read all the data in the table, use this one:
> SELECT * FROM table_name;
However, it is usually required to set a condition to read the data we need. You may have millions or billions of records, and it’s highly advisable not to return all this amount of data at once.
To do this, add the Where clause along with the condition.
> SELECT * FROM table_name WHERE [condition]
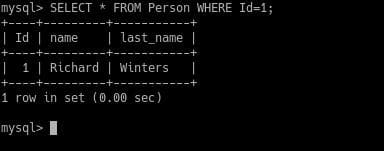
For example, if I wanted to read all the fields where the id is 1, I would use the following statement:
> SELECT * FROM Person WHERE Id=1;
Update data
You may have inserted an incorrect data, so you need to update it. To do this, we need to use the Update statement.
First, you need to know which record needs to be updated; it is necessary to add a small condition. Otherwise, it will update all records. So you need to be careful.
The basic syntax is as follows:
> UPDATE table_name SET column1 = value1, column2 = value2 WHERE [condition];
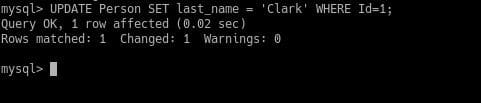
Continuing with the previous example, if you want to update the “last_name” column of the data whose Id is “1”, you would do it in the following way:
> UPDATE Person SET last_name = 'Clark' WHERE Id=1;
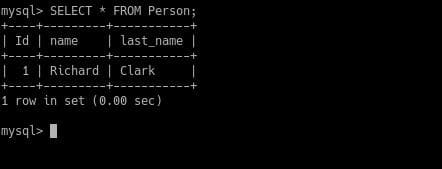
Now, run the select statement again to see the changes:
> SELECT * FROM Person;
Delete a record
If you want to delete records, you can use the delete statement. Also, you have to use a condition to know which record to delete.
The basic syntax of the delete command is as follows:
> DELETE FROM table_name WHERE condition;
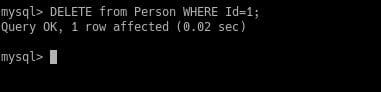
For example, if you want to delete a record whose Id has a value of 1, the statement would be as follows:
> DELETE from Person WHERE Id=1;
Import SQL file
MySQL allows you to import a database backup in SQL format. It is a great advantage if we want to move a database to a new server.
The first requirement is to create a database where the SQL file will be imported.
> CREATE DATABASE example2;
Then, we can exit the console using the following command:
> exit;
After that, we can start importing the file with the following command as the root user:
$ sudo mysql -u username -p [database] < [sql_file_path]

Note that it is necessary to write the full path where the SQL file is located. In our case, the file “file.sql” is located on the home folder.
Export database
If MySQL can import a database, then it can also export a database to an SQL file.
To do this, without being in the MySQL console, we run the following command:
$ sudo mysqldump -u username -p database_to_export > file.sql
You can check the results using the ls command:
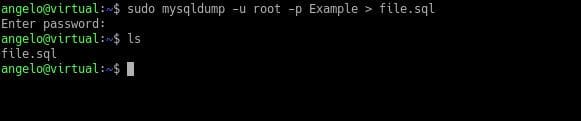
When running the command, you will be prompted for the MySQL root user password.
Also, remember that this command must be run by the root user of the system or use sudo. Finally, it is possible to choose the path of the output file.
Backup database
MySQL has a tool called mysqldump that allows you to make backups of the databases in a MySQL instance. It is a very useful and agile tool.
Making a backup is similar to exporting a database as we have seen before. However, it is also possible with this tool to make a backup of all existing databases.
For it, it is enough to run the following command as a root user or with sudo:
$ sudo mysqldump -u root -p --all-databases > alldatabases.sql

Make MySQL case insensitive
When developing independent applications, the names of the tables are usually a problem. By default, MySQL is case sensitive in table names.
Therefore, in some cases, you need to revert this behavior.
To make this change, it is necessary to add a directive in the MySQL configuration file. First, stop the MySQL service.
$ sudo systemctl stop mysql
If we use CentOS, the command is as follows:
$ systemctl stop mysqld

After this, edit the following specific configuration file. So open it with root user permissions:
On Ubuntu:
$ sudo nano /etc/mysql/mysql.conf.d/mysqld.cnf
If we use CentOS, the path will be different. The path will be
/etc/my.cnf
.
Then, under the section [mysqld] add the following directive:
lower_case_table_names = 1
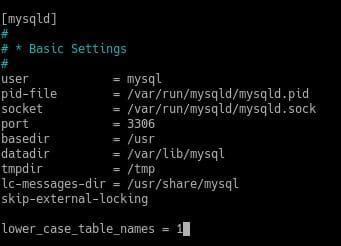
Then save the changes and close the file.
Next, we need to start the MySQL service again.
$ sudo systemctl start mysql
Or on CentOS:
$ systemctl start mysqld
And that is enough. You can create tables with upper and lower case, and MySQL will treat them the same way.
Where are MySQL logs on Linux?
Log files are sequential records of all events related to a particular program or system service.
It is very important to check them from time to time in search for any abnormal behaviors in the execution of the program. Also, when the MySQL service fails or cannot start, the error is recorded directly in the log.
On Ubuntu, the MySQL logs are saved in
/var/log/mysql/error.log
.
In the case of CentOS, the file is located in
/var/log/mysqld.log
.
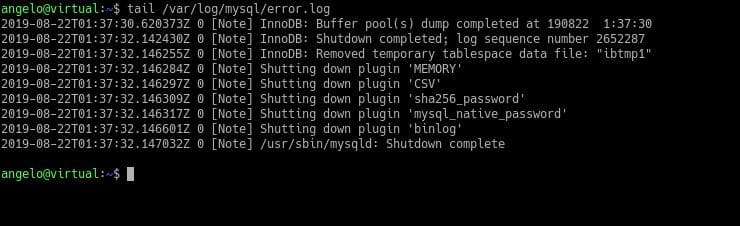
To review the contents of the file, you can use the tail command. For example:
$ tail /var/log/mysql/error.log
Or, if you use CentOS:
$ tail /var/log/mysqld.log
By running it, you will be able to see everything that has happened with the service.
Also, you can use -f option with the tail command to continuously see the latest updates for the log records.
$ tail -f /var/log/mysqld.log
Uninstall MySQL
In case you want to uninstall MySQL from Linux, just invoke the package manager of each distribution.
In the case of Ubuntu, we use the APT package manager. To uninstall it, the following command is enough:
$ sudo apt remove mysql

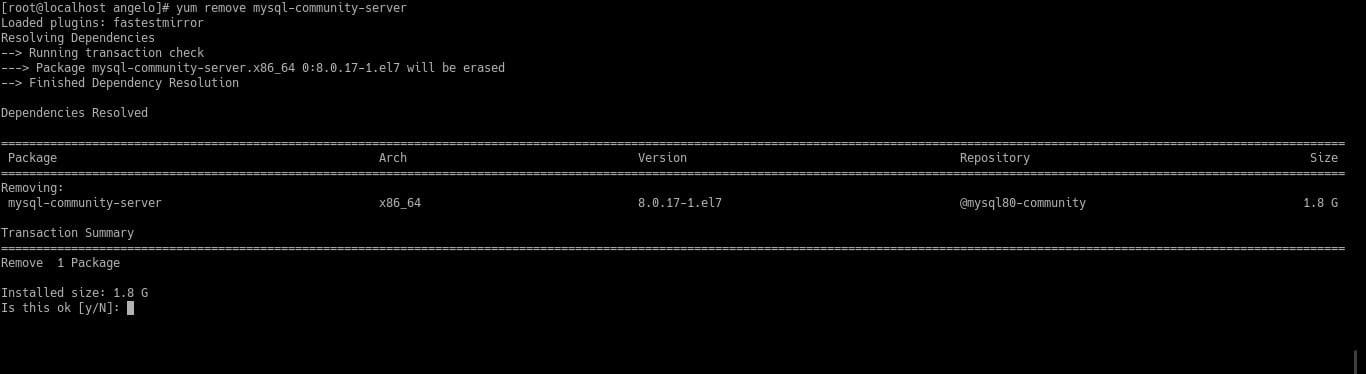
On CentOS, the package manager is YUM, so as the root user, use the following command:
$ yum remove mysql-community-server
Conclusion
MySQL is a very popular relational database. Its power & ease of use as we saw makes it the favorite engine for a large number of developers. However, in this post, we have covered some basics of MySQL on Linux.
I hope you find the tutorial useful. Keep coming back.
Mokhtar is the founder of LikeGeeks.com. He is a seasoned technologist and accomplished author, with expertise in Linux system administration and Python development. Since 2010, Mokhtar has built an impressive career, transitioning from system administration to Python development in 2015. His work spans large corporations to freelance clients around the globe. Alongside his technical work, Mokhtar has authored some insightful books in his field. Known for his innovative solutions, meticulous attention to detail, and high-quality work, Mokhtar continually seeks new challenges within the dynamic field of technology.
could you please provide python scripting complete guide
I’ll make it on the tutorials list that I’ll write about.
Hi there, Great Content. Have you made more blogs on MySQL that would take the learning further?
Hi,
That is the only tutorial for MySQL on Linux, but will defiantly write more in the near future.
Regards,