Install and Configure Linux LDAP Server
Two days ago, one of the website visitors was searching on the website for LDAP and found nothing, that drives me to make a post about the LDAP server, so we fill the gaps and bring the loved content to the visitors.
- 1 What is LDAP?
- 2 Uses of LDAP
- 3 LDAP server implementations
- 4 Installing OpenLDAP
- 5 Configuring LDAP
- 6 LDAP terminology
- 7 Modifying entries
- 8 Adding entries
- 9 Adding organizational units
- 10 Adding users
- 11 Adding groups
- 12 Deleting entries
- 13 LDAP port
- 14 Authenticating users with LDAP
- 15 Using LDAP web interface (phpldapadmin)
What is LDAP?
We know that Linux keeps registered users on /etc/passwd file, so if you want to access the machine, you must have a user on that file.
If you are working with one or few machines, that should be OK, but what if you have hundreds of machines or maybe thousands, and how you will maintain user management tasks like password modification or any other administrative task like somebody left the work and you need to close his account, would you go to every machine to do that?
That could be a nightmare, or you need to create a new account. In this case, we need a centralized user account management system, a database to keep all information related to user accounts.
The most used solution for this problem is the Lightweight Directory Access Protocol (LDAP).
LDAP uses the usual client/server paradigm.
Uses of LDAP
LDAP not only keeps a list of users, but you can also use it as storage for your files.
You can use it for authenticating users as we mentioned above. Also, you can store DNS records in the LDAP server.
Another usage for LDAP, you can use it as a yellow pages directory service for an organization to provide information about users or employees, departments, contact information, phone numbers, addresses, private data, or whatever.
LDAP server implementations
LDAP is an open standard protocol that many companies make their implementation of the protocol.
There are commercial implementations of LDAP like:
- Microsoft Active Directory.
- Oracle Internet Directory.
- Oracle Unified Directory.
- IBM Security Directory Server.
- UnboundID Directory Server.
- NetIQ eDirectory or eDirectory.
- CA Directory or CA eTrust Directory.
And free open source implementations like:
- OpenLDAP.
- ForgeRock OpenDJ.
- Apache DS.
- 389 Directory Server.
In this post, we will use OpenLDAP, which is very common and loved by the community.
OpenLDAP is the open-source implementation of LDAP that runs on Linux/UNIX systems.
Installing OpenLDAP
To install OpenLDAP, you have to install openldap, openldap-servers, and openldap-clients packages.
$ yum -y install openldap openldap-servers openldap-clients
Or, if you are using CentOS 7, you can use dnf or Dandified Yum.
$ dnf -y install openldap openldap-servers openldap-clients
If you are using a Debian based system like Ubuntu, you can install it like this:
$ sudo apt-get install slapd

$ sudo apt-get install ldap-utils
Then we can enable the service to run automatically at startup:
$ systemctl enable slapd
Configuring LDAP
After successful installation, you need to make a password for the admin user using the ldappasswd command:
$ ldappasswd
The configuration files for OpenLDAP are in /etc/openldap/slapd.d directory.
You can modify these files directly or use the ldapmodify command. It is strongly recommended to modify OpenLDAP using the ldapmodify command.
LDAP terminology
If we are going to deal with LDAP protocol, there are some terms that we need to know because we will use them a lot.
Entry (or object): every unit in LDAP considered an entry.
dn: the entry name.
o: Organization Name.
dc: Domain Component. For example, you can write likegeeks.com like this dc=likegeeks,dc=com.
cn: Common Name like the person name or name of some object.
Modifying entries
OpenLDAP stores its information in bdb or hdb files. You can find the hdb file in:
/etc/openldap/slapd.d/cn=config/olcDatabase={2}hdb.ldif
file.
To identify an element, use the dn (distinguished name) attribute. So the first line in our LDIF file will be:
dn: olcDatabase={2}hdb,cn=config
Then we specify if we want to add or modify
changeType: modify
We also must clarify if we’ll replace it or delete it
replace: olcSuffix
And, finally, we type the new value of the changed attribute.
olcSuffix: dc=likegeeks,dc=local
Back to our file. Change the following entries like this:
olcSuffix: dc=my-domain,dc=com
olcRootDN: cn=Manager,dc=my-domain,dc=com
So our LDIF file will be like this:
dn: olcDatabase={2}hdb,cn=config
changeType: modify
replace: olcSuffix
olcSuffix: dc=likegeeks,dc=local
-
replace: olcRootDN
olcRootDN: cn=admin,dc=example,dc=local
In our file
/etc/openldap/slapd.d/cn=config/olcDatabase={2}hdb.ldif
file. The dn attribute is dn:
olcDatabase={2}hdb, and because the file is inside the config folder, so the full dn attribute is dn:
olcDatabase={2}hdb,cn=config
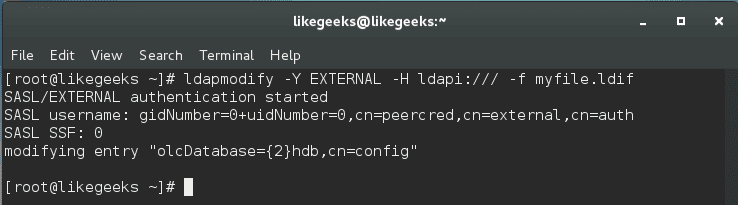
Then we save our file and use ldapmodify:
$ ldapmodify -Y EXTERNAL -H ldapi:/// -f myfile.ldif
You can use the ldapsearch command to check the changes:
$ ldapsearch -Y EXTERNAL -H ldapi:/// -b cn=config olcDatabase=\*
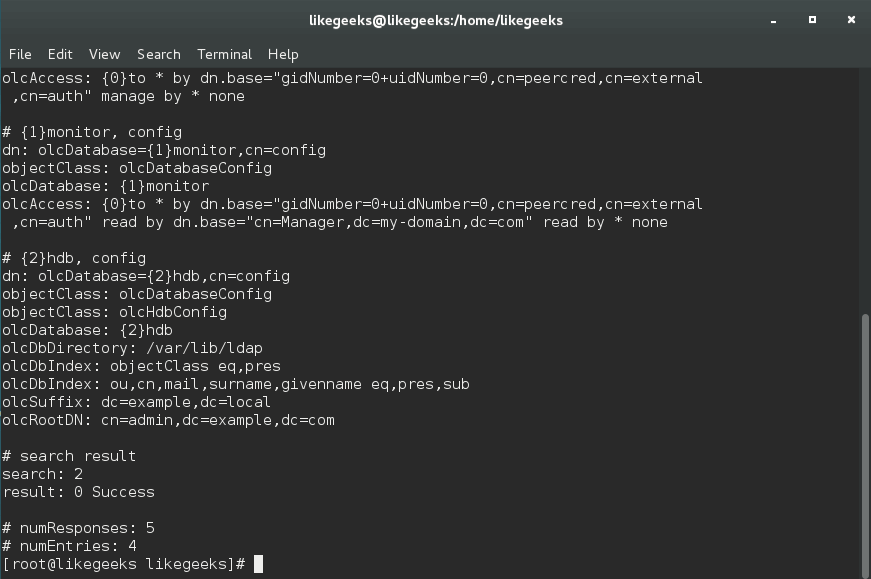
And yes, the data has been changed.
Also, you can use the slaptest command to check the configuration.
$ slaptest -u
Adding entries
To add entries, use the ldapadd command.
First, we create our ldif file:
dn: dc=likegeeks,dc=local
objectClass: dcObject
objectClass: organization
dc: likegeeks
o: likegeeks
We specify a series of attributes, like domain component ( dc ), distinguished name ( dn ), and organization ( o ).
According to the type of the object we are creating, which is dcObject in our case, some attributes are required, others are optional.
You check the schema according to your system.
On CentOS 6, you can go to
/etc/openldap/slapd.d/cn=config/cn=schema
On CentOS 7, you can go to
/etc/openldap/schema
Or you can use grep command to get the .schema files from your system.
The object organization in our example is in
core.schema
file on CentOS 7.
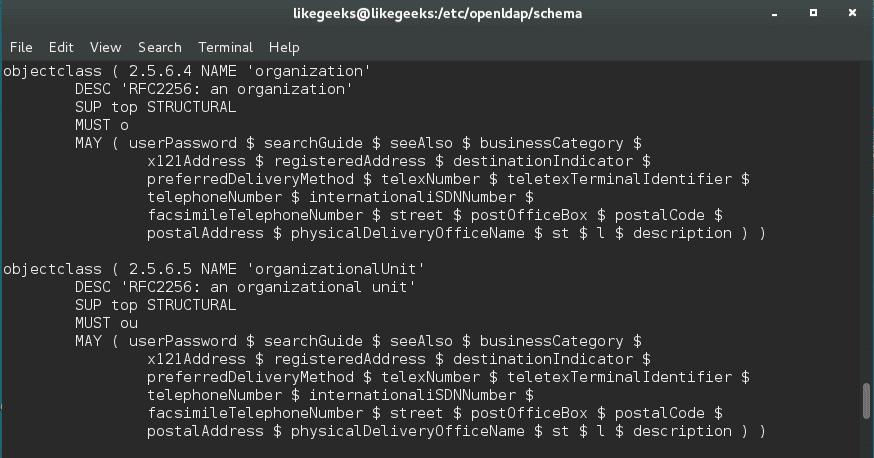
As we can see, the only required attribute is o which is the organization.
Now we can use the ldapadd command to add our object:
$ ldapadd -f myobj.ldif -D cn=admin,dc=likegeeks,dc=local -w mypass
We specify the filename using -f, the admin user using -D, and the password using -w.
To search for an entry, you can use the ldapsearch command:
$ ldapsearch -x -b dc=likegeeks,dc=local
Adding organizational units
You can add an organizational unit (ou). First, create a new LDIF file. Let’s name it users.ldif, and put this:
dn: ou=users,dc=likegeeks,dc=local
objectClass: organizationalUnit
ou: users
Then we use ldapadd to add the unit:
$ ldapadd -f users.ldif -D cn=admin,dc=likegeeks,dc=local -w mypass
This organizational unit holds all LDAP users.
Adding users
We can add users to the newly created organizational unit.
First, we create our ldif file:
dn: cn=adam,ou=users,dc=likegeeks,dc=local
cn: adam
sn: USA
objectClass: myorg
userPassword: mypass
uid: adam
Then add the user using ldapadd command:
$ ldapadd -f adam.ldif -x -D cn=admin,dc=likegeeks,dc=local 2 -w mypass
Adding groups
Also, we create the ldif file first:
dn: cn=developers,ou=users,dc=likegeeks,dc=local
cn: developers
objectClass: groupOfNames
member: cn=adam,ou=users,dc=likegeeks,dc=local
Then run ldapadd to add the group:
$ ldapadd -f groups.ldif -x -D cn=admin,dc=likegeeks,dc=local -w mypass
Deleting entries
Deleting an entry is very easy, just use ldapdelete command with the cn you want:
$ ldapdelete "cn=adam,ou=users,dc=likegeeks,dc=local" -D cn=admin,dc=likegeeks,dc=local -w mypass
You can check if the entry is deleted using ldapsearch:
$ ldapsearch -x -b "dc=likegeeks,dc=local"
LDAP port
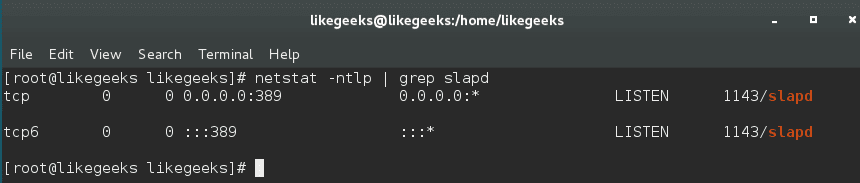
LDAP port is 389, and in case you secure your LDAP using TLS, the port will be 636.
You can ensure what port your OpenLDAP is running using the netstat command.
$ netstat -ntlp | grep slapd
Authenticating users with LDAP
By default, Linux authenticates users using /etc/passwd file. Now we will see how to authenticate users using OpenLDAP.
Make sure you allow the OpenLDAP ports (389, 636) on your system.
If you are using the iptables firewall, I recommend you review the iptables.
$ authconfig --enableldap --enableldapauth --ldapserver ver=192.168.1.10 --ldapbasedn="dc=likegeeks,dc=local" --enableldaptls --update
Now the certificates are in /etc/openldap/cacerts.
When we create a user, you have to define some needed fields.
If you want to create a user adam, you will create adam.ldif file and write the following:
dn: uid=adam,ou=users,dc=likegeeks,dc=local
uid: adam
cn: adam
objectClass: account
objectClass: posixAccount
objectClass: top
objectClass: shadowAccount
userPassword:: mypass
shadowLastChange: 14846
shadowMax: 99999
shadowWarning: 7
loginShell: /bin/bash
uidNumber: 500
gidNumber: 1000
homeDirectory: /home/adam
If you are using CentOS 7 you should encrypt passwords using slappasswd command before putting it in your LDIF file like this:
$ slappasswd
Then we copy the encrypted password on the ldif file, so the file will be like this:
uid: adam
cn: adam
objectClass: account
objectClass: posixAccount
objectClass: top
objectClass: shadowAccount
userPassword:: {SSHA}sathXSo3XTWrbi20Fp+MsqJHjXkHGhT/
shadowLastChange: 14846
shadowMax: 99999
shadowWarning: 7
loginShell: /bin/bash
uidNumber: 500
gidNumber: 1000
homeDirectory: /home/adam
Now we can use ldapadd to add the user:
$ ldapadd -f adam.ldif -x -D cn=admin,dc=likegeeks,dc=local -w mypass
Using LDAP web interface (phpldapadmin)
It might be a little tricky for a beginner to work from a terminal. However, there is a web-based tool called phpldapadmin, which is written in PHP to simplify working with OpenLDAP.
You can install it like this:
$ yum -y install phpldapadmin
The above command will install the Apache web server, so you don’t need to install it.
Now you need to configure phpldapadmin.
Edit this file:
/etc/phpldapadmin/config.php
And change this line:
$servers->setValue('server','host','PUT YOUR SERVER IP OR DOMAIN HERE');
If you want to use likegeeks.local as a domain you should write it like this:
$servers->setValue('server','base',array('dc=likegeeks,dc=local'));
Also, you need to change the line of bind_id like this:
$servers->setValue('login','bind_id','cn=admin,dc= likegeeks,dc=local');
And don’t forget to put your apache alias:
<IfModule mod_alias.c>
    Alias /ldap /usr/share/phpldapadmin/htdocs
</IfModule>
Now you can access your phpldapadmin like this:
http://server_domain_name_or_IP/ldap
in my example, I will use:
http://likegees.local/ldap
On login DN field you will use something like the following:
cn=admin,dc=likegeeks,dc=local
You can do all we’ve done in this web interface, adding users, organizations, and groups.
I hope you find the tutorial useful and easy. We can’t cover all LDAP server uses in one post, but this was a brief look into LDAP protocol and how to use it.
Thank you.
Mokhtar is the founder of LikeGeeks.com. He is a seasoned technologist and accomplished author, with expertise in Linux system administration and Python development. Since 2010, Mokhtar has built an impressive career, transitioning from system administration to Python development in 2015. His work spans large corporations to freelance clients around the globe. Alongside his technical work, Mokhtar has authored some insightful books in his field. Known for his innovative solutions, meticulous attention to detail, and high-quality work, Mokhtar continually seeks new challenges within the dynamic field of technology.
Great post. Thanks for your efforts.
Thank you. Appreciate it.
Awesome article, thanks for sharing!
You are welcome! Thank you very much!
great thank’s
You are welcome! Thanks!
Great post.
Thanks a lot.
Do you have any documentation for the same process to automate
What do you mean by automating the process? Do you mean the installation & configuration for LDAP?
not ldappassword but ldappasswd
Thanks a lot for the correction.
Theres no command for authconfig, pls explain
Hi,
authconfig is a utility that enables you to configure your LDAP server with ease.
Ex: to enable the server, you can use it with –enableldap
$ authconfig –enableldap –ldapserver=ldapserver.mydomain.com
Also, you can use authconfig-gtk as a GUI for authconfig utility if you want.
Regards,
Authconfig: command not found??
Hi,
make sure that you have installed the package if your system doesn’t include it
$ yum install ldap-auth-configAlso, you can install the GUI tool like this:
$ yum install authconfig-gtk*Regards,
After a clean installation in a new debian vm I got
mirko@ldap:~$ ldappasswd
SASL/DIGEST-MD5 authentication started
Please enter your password:
ldap_sasl_interactive_bind_s: Invalid credentials (49)
additional info: SASL(-13): user not found: no secret in database
What am I doing wrong?
Hi,
Try adding the -x option to set password authentication.
“slappasswd” works for me
Great!
Keep up the good work!
As I thought there will be no such post regarding to LDAP and I really tired with searching. Finally I found this. Funny part is that you already mentioned that in starting of article.
Thanks very much for this
You’re welcome! I’m glad that the article was of help to you.
It’s indeed sometimes the case that the information we need is right in front of us, just as you’ve experienced.