Grep command in Linux (With Examples)
In this tutorial, you will learn how to use the very essential grep command in Linux. We’re going to go over why this command is important to master, and how you can utilize it in your everyday tasks at the command line.
Let’s dive right in with some explanations and examples.
- 1 Why do we use grep?
- 2 Find a string
- 3 Find multiple strings
- 4 Difference between grep, egrep fgrep, pgrep, zgrep
- 5 Difference between find and grep
- 6 Search recursively
- 7 Catch space or tab
- 8 Using regular expressions
- 9 Grep gz files without unzipping
- 10 Grep email addresses from a zip file
- 11 Grep IP addresses
- 12 Grep or condition
- 13 Ignore case sensitivity
- 14 Search with case sensitive
- 15 Grep exact match
- 16 Exclude pattern
- 17 Grep and replace
- 18 Grep with line number
- 19 Show lines before and after
- 20 Sort the result
Why do we use grep?
Grep is a command-line tool that Linux users use to search for strings of text. You can use it to search a file for a certain word or combination of words, or you can pipe the output of other Linux commands to grep, so grep can show you only the output that you need to see.
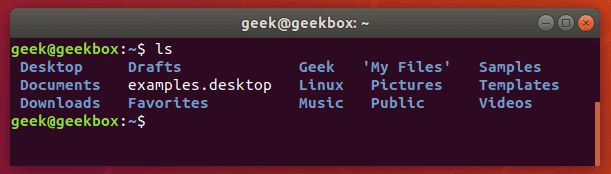
Let’s look at some really common examples. Say that you need to check the contents of a directory to see if a certain file exists there. That’s something you would use the “ls” command for.
But, to make this whole process of checking the directory’s contents even faster, you can pipe the output of the ls command to the grep command. Let’s look in our home directory for a folder called Documents.
And now, let’s try checking the directory again, but this time using grep to check specifically for the Documents folder.
$ ls | grep Documents
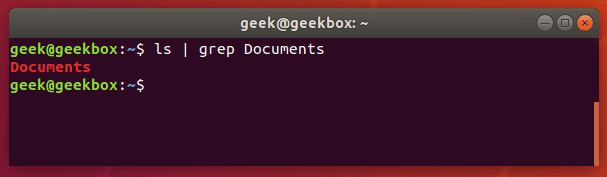
As you can see in the screenshot above, using the grep command saved us time by quickly isolating the word we searched for from the rest of the unnecessary output that the ls command produced.
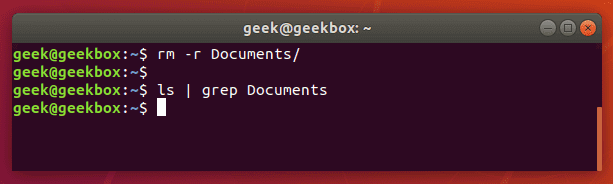
If the Documents folder didn’t exist, grep wouldn’t return any output. So if grep returns nothing, that means that it couldn’t find the word you are searching for.
Find a string
If you need to search for a string of text, rather than just a single word, you will need to wrap the string in quotes. For example, what if we needed to search for the “My Documents” directory instead of the single-worded “Documents” directory?
$ ls | grep 'My Documents'
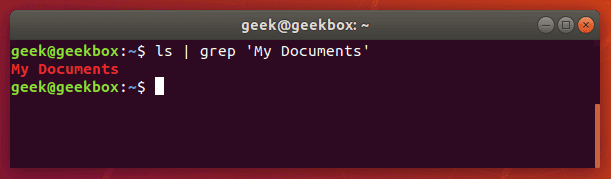
Grep will accept both single quotes and double quotes, so wrap your string of text with either.
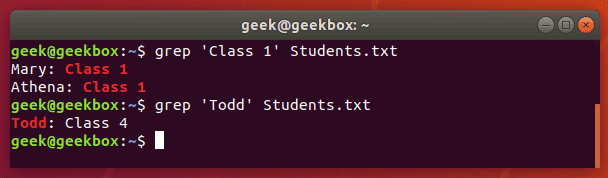
While you can use grep to search the output piped from other command-line tools, you can also use it to search documents directly. Here’s an example where we search a text document for a string.
$ grep 'Class 1' Students.txt
Find multiple strings
You can also use grep to find multiple words or strings. You can specify multiple patterns by using the -e switch. Let’s try searching a text document for two different strings:
$ grep -e 'Class 1' -e Todd Students.txt
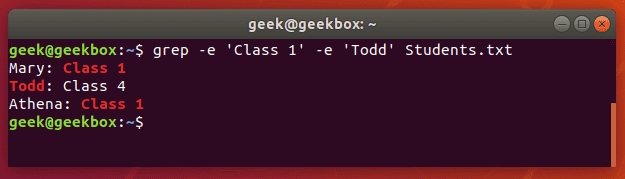
Notice that we only needed to use quotes around the strings that contained spaces.
Difference between grep, egrep fgrep, pgrep, zgrep
Various grep switches were historically included in different binaries. On modern Linux systems, you will find these switches available in the base grep command, but it’s common to see distributions support the other commands as well.
From the man page for grep:

egrep is the equivalent of grep -E
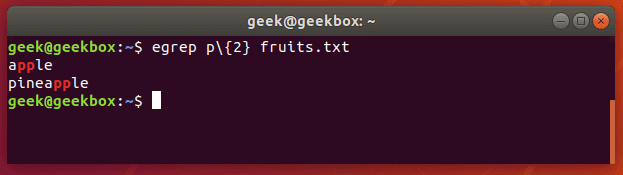
This switch will interpret a pattern as an extended regular expression. There’s a ton of different things you can do with this, but here’s an example of what it looks like to use a regular expression with grep.
Let’s search a text document for strings that contain two consecutive ‘p’ letters:
$ egrep p\{2} fruits.txt
or
$ grep -E p\{2} fruits.txt
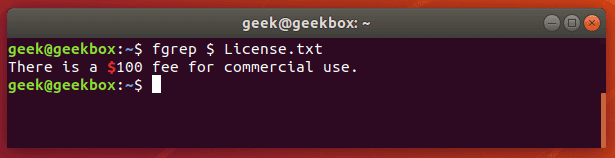
fgrep is the equivalent of grep -F
This switch will interpret a pattern as a list of fixed strings, and try to match any of them. It’s useful when you need to search for regular expression characters. This means you don’t have to escape special characters like you would with regular grep.

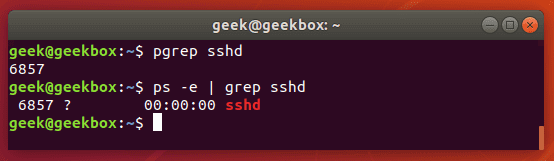
pgrep is a command to search for the name of a running process on your system and return its respective process IDs. For example, you could use it to find the process ID of the SSH daemon:
$ pgrep sshd
This is similar in function to just piping the output of the ‘ps’ command to grep.
You could use this information to kill a running process or troubleshoot issues with the services running on your system.
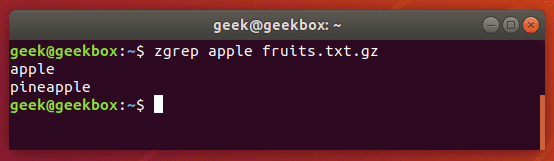
You can use zgrep to search compressed files for a pattern. It allows you to search the files inside of a compressed archive without having to first decompress that archive, basically saving you an extra step or two.
$ zgrep apple fruits.txt.gz
zgrep also works on tar files, but only seems to go as far as telling you whether or not it was able to find a match.
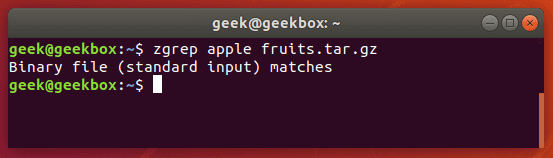
We mention this because files compressed with gzip are very commonly tar archives.
Difference between find and grep
For those just starting out on the Linux command line, it’s important to remember that find and grep are two commands with two very different functions, even though we use both to “find” something that the user specifies.
It’s handy to use grep to find a file when you use it to search through the output of the ls command as we showed in the first examples of the tutorial.
However, if you need to search recursively for the name of a file – or part of the file name if you use a wildcard (asterisk) – you’re much ahead to use the ‘find’ command.
$ find /path/to/search -name name-of-file
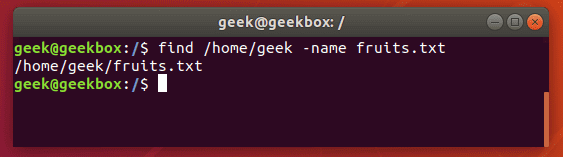
The output above shows that the find command was able to successfully locate the file we searched for.
Search recursively
You can use the -r switch with grep to search recursively through all files in a directory and its subdirectories for a specified pattern.
$ grep -r pattern /directory/to/search
If you don’t specify a directory, grep will just search your present working directory. In the screenshot below, grep found two files matching our pattern, and returns with their file names and which directory they reside in.

Catch space or tab
As we mentioned earlier in our explanation of how to search for a string, you can wrap text inside quotes if it contains spaces. The same method will work for tabs, but we’ll explain how to put a tab in your grep command in a moment.
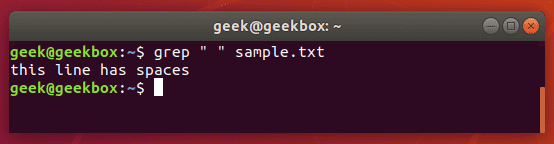
Put a space or multiple spaces inside quotes to have grep search for that character.
$ grep " " sample.txt
There are a few different ways you can search for a tab with grep, but most of the methods are experimental or can be inconsistent across different distributions.
The easiest way is to just search for the tab character itself, which you can produce by hitting ctrl+v on your keyboard, followed by tab.
Normally, pressing tab in a terminal window tells the terminal that you want to auto-complete a command, but pressing the ctrl+v combination beforehand will cause the tab character to be written out as you’d normally expect it to in a text editor.
$ grep " " sample.txt
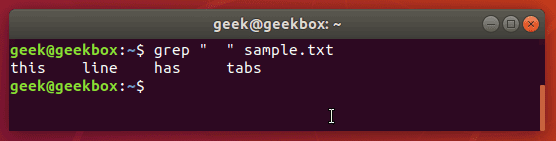
Knowing this little trick is especially useful when greping through configuration files in Linux since tabs are frequently used to separate commands from their values.
Using regular expressions
Grep’s functionality is further extended by using regular expressions, allowing you more flexibility in your searches. Several exist, and we will go over some of the most commons ones in the examples below:
[ ] brackets are used to match any of a set of characters.
$ grep "Class [123]" Students.txt
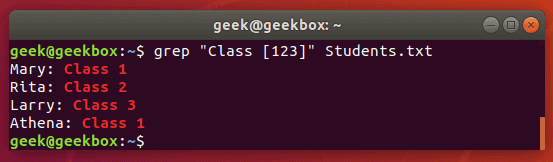
This command will return any lines that say ‘Class 1’, ‘Class2’, or ‘Class 3’.
[-] brackets with a hyphen can be used to specify a range of characters, either numerical or alphabetical.
$ grep "Class [1-3]" Students.txt
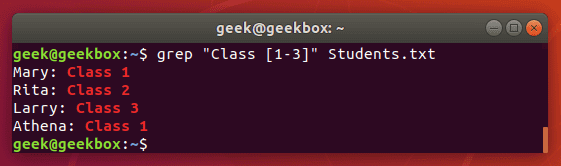
We get the same output as before, but the command is much easier to type, especially if we had a bigger range of numbers or letters.
^ caret is used to search for a pattern that only occurs at the beginning of a line.
$ grep "^Class" Students.txt
![]()
[^] brackets with caret are used to exclude characters from a search pattern.
$ grep "Class [^1-2]" Students.txt
![]()
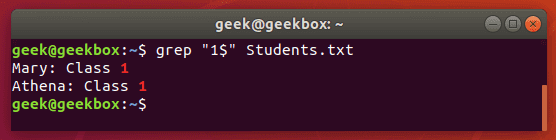
$ dollar sign is used to search for a pattern that only occurs at the end of a line.
$ grep "1$" Students.txt
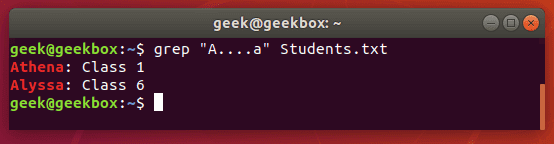
. dot is used to match any one character, so it’s a wildcard but only for a single character.
$ grep "A….a" Students.txt
Grep gz files without unzipping
As we showed earlier, you can use the zgrep command to search through compressed files without having to unzip them first.
$ zgrep word-to-search /path/to/file.gz
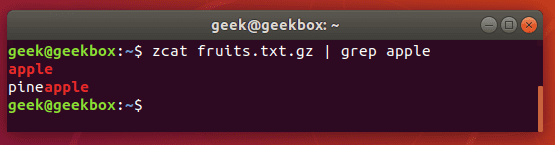
You can also use the zcat command to display the contents of a gz file and then pipe that output to grep to isolate the lines containing your search string.
$ zcat file.gz | grep word-to-search
Grep email addresses from a zip file
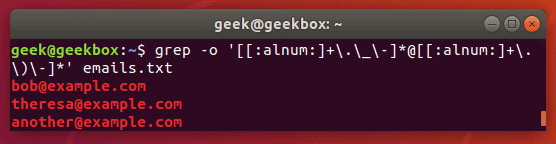
We can use a fancy regular expression to extract all the email addresses from a zip file.
$ grep -o '[[:alnum:]+\.\_\-]*@[[:alnum:]+\.\_\-]*' emails.txt
The -o flag will extract the email address only, rather than showing the entire line that contains the email address. This results in a cleaner output.
As with most things in Linux, there is more than one way to do this. You could also use egrep and a different set of expressions. But the example above works just fine and is a pretty simple way to extract the email addresses and ignore everything else.
Grep IP addresses
Greping for IP addresses can get a little complex because we can’t just tell grep to look for four numbers separated by dots – well, we could, but that command has the potential to return invalid IP addresses as well.
The following command will find and isolate only valid IPv4 addresses:
$ grep -E -o "(25[0-5]|2[0-4][0-9]|[01]?[0-9][0-9]?)\.(25[0-5]|2[0-4][0-9]|[01]?[0-9][0-9]?)\.(25[0-5]|2[0-4][0-9]|[01]?[0-9][0-9]?)\.(25[0-5]|2[0-4][0-9]|[01]?[0-9][0-9]?)" /var/log/auth.log
We used this on our Ubuntu server just to see where the latest SSH attempts have been made from.
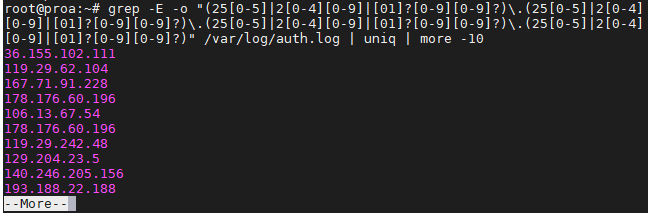
To avoid repeat information and prevent it from flooding your screen, you may want to pipe your grep commands to “uniq” and “more” as we did in the screenshot above.
Grep or condition
There are a few different ways you can use an or condition with grep, but we will show you the one that requires the least amount of keystrokes and is easiest to remember:
$ grep -E 'string1|string2' filename
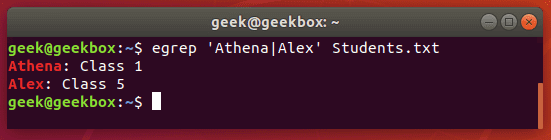
or, technically using egrep is even fewer keystrokes:
$ egrep 'string1|string2' filename
Ignore case sensitivity
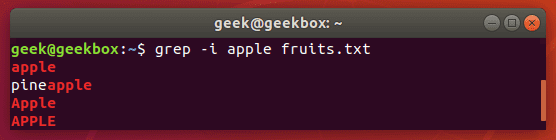
By default, grep is case sensitive, which means you have to be precise in the capitalization of your search string. You can avoid this by telling grep to ignore the case with the -i switch.
$ grep -i string filename
Search with case sensitive
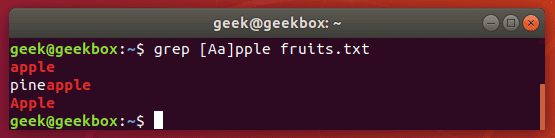
What if we want to search for a string where the first can be uppercase or lowercase, but the rest of the string should be lowercase? Ignoring case with the -i switch won’t work in this case, so a simple way to do it would be with brackets.
$ grep [Ss]tring filename
This command tells grep to be case sensitive except for the first letter.
Grep exact match
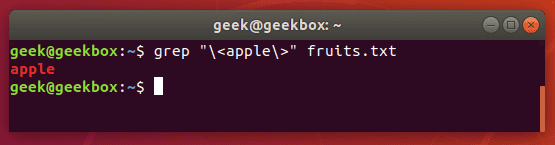
In our examples above, whenever we search our document for the string “apple”, grep also returns “pineapple” as part of the output. To avoid this, and search for strictly “apple”, you can use this command:
$ grep "\<apple\>" fruits.txt
You can also use the -w switch, which will tell grep that the string must match the whole line. Obviously, this will only work in situations where you’re not expecting the rest of the line to have any text at all.
Exclude pattern
To see the contents of a file but exclude patterns from the output, you can use the -v switch.
$ grep -v string-to-exclude filename
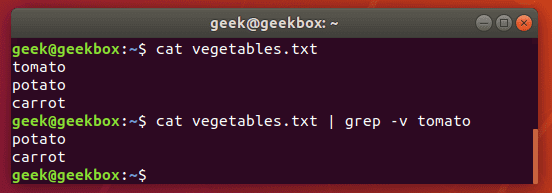
As you can see in the screenshot, the string we excluded is no longer shown when we run the same command with the -v switch.
Grep and replace
A grep command piped to sed can be used to replace all instances of a string in a file. This command will replace “string1” with “string2” in all files relative to the present working directory:
$ grep -rl 'string1' ./ | xargs sed -i 's/string1/string2/g'
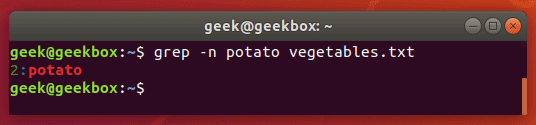
Grep with line number
To show the line number that contains your string, use the -n switch:
$ grep -n string filename
Show lines before and after
If you need a little more context to the grep output, you can show one line before and after your specified search string with the -c switch:
$ grep -c 1 string filename
Specify the number of lines you wish to show – we did only 1 line in this example.

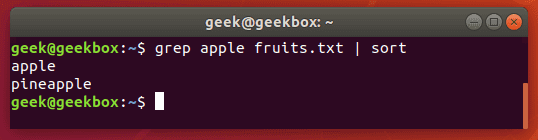
Sort the result
Pipe greps output to the sort command to sort your results in some kind of order. The default is alphabetical.
$ grep string filename | sort
I hope you find the tutorial useful. Keep coming back.
Mokhtar is the founder of LikeGeeks.com. He is a seasoned technologist and accomplished author, with expertise in Linux system administration and Python development. Since 2010, Mokhtar has built an impressive career, transitioning from system administration to Python development in 2015. His work spans large corporations to freelance clients around the globe. Alongside his technical work, Mokhtar has authored some insightful books in his field. Known for his innovative solutions, meticulous attention to detail, and high-quality work, Mokhtar continually seeks new challenges within the dynamic field of technology.