Create Video from 3D Plot in Python
In this tutorial, you’ll learn how to create a video from a 3D plot using Python.
You’ll start by creating a 3D plot, then animate it, and finally convert the animation into a video.
You’ll also explore advanced methods like creating complex animations and integrating audio.
Create Animated 3D plot
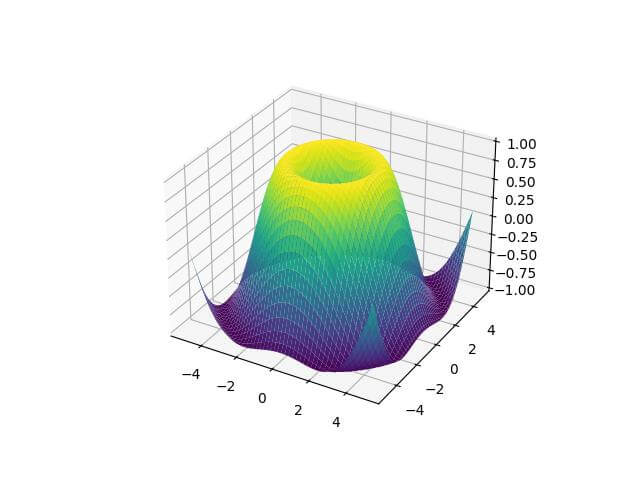
To create an animation of the 3D plot rotating, you can use the FuncAnimation function like this:
import numpy as np
import matplotlib.pyplot as plt
from mpl_toolkits.mplot3d import Axes3D
from matplotlib.animation import FuncAnimation
x = np.linspace(-5, 5, 100)
y = np.linspace(-5, 5, 100)
x, y = np.meshgrid(x, y)
z = np.sin(np.sqrt(x**2 + y**2))
fig = plt.figure()
ax = fig.add_subplot(111, projection='3d')
surf = ax.plot_surface(x, y, z, cmap='viridis')
def update(frame):
  ax.clear()
  z = np.sin(np.sqrt(x**2 + y**2) + frame / 10.0)
  ax.plot_surface(x, y, z, cmap='viridis')
ani = FuncAnimation(fig, update, frames=100, interval=50)
plt.show()
Output:
Customize the animation (frame rate, duration)
You can customize various aspects of the animation by adjusting the parameters of the FuncAnimation function:
anim = FuncAnimation(fig, update,
                     frames=np.linspace(0, 360, 120),  # 120 frames for a full rotation
                     interval=33,  # 33ms between frames (approx. 30 fps)
                     blit=False,
                     repeat=True)  # Loop the animation
This customization creates a smoother animation with 120 frames for a full rotation, running at approximately 30 frames per second, and looping continuously.
Video Creation Process
You can set the frame rate and resolution when saving the animation as a video:
from matplotlib.animation import writers
Writer = writers['ffmpeg']
writer = Writer(fps=30, metadata=dict(artist='LikeGeeks'), bitrate=1800)
This sets up a writer with a frame rate of 30 fps and a bitrate of 1800 kbps.
To save the animation as a video, you can use the save method of the animation object:
anim.save('3d_plot_animation.mp4', writer=writer)
This will save your animation as an MP4 video file named ‘3d_plot_animation.mp4’ in your current working directory.
Create Complex Animations
You can create more complex animations by incorporating multiple moving elements.
Here’s an example that adds a moving point to the rotating surface:
import numpy as np
import matplotlib.pyplot as plt
from mpl_toolkits.mplot3d import Axes3D
from matplotlib.animation import FuncAnimation, writers
x = np.linspace(-5, 5, 100)
y = np.linspace(-5, 5, 100)
x, y = np.meshgrid(x, y)
z = np.sin(np.sqrt(x**2 + y**2))
fig = plt.figure(figsize=(10, 8))
ax = fig.add_subplot(111, projection='3d')
def z_function(x, y, t):
  return np.sin(np.sqrt(x**2 + y**2) + t / 10.0)

def update(frame):
  ax.clear()
  t = frame / 10.0
  z = z_function(x, y, t)
  ax.plot_surface(x, y, z, cmap='viridis', alpha=0.8)
  ax.set_zlim(-1, 1)

  theta = 2 * np.pi * frame / 120  # Full rotation over 120 frames
  r = 3 + np.sin(3 * theta)  # Radius varies between 2 and 4
  point_x = r * np.cos(theta)
  point_y = r * np.sin(theta)
  point_z = z_function(point_x, point_y, t)

  # Plot the moving point
  ax.scatter([point_x], [point_y], [point_z], color='red', s=50, label='Moving Point')
  ax.set_xlabel('X')
  ax.set_ylabel('Y')
  ax.set_zlabel('Z')
  ax.set_title(f'3D Animated Surface with Moving Point (t={t:.2f})')
  ax.legend()
anim = FuncAnimation(fig, update,
                   frames=120,
                   interval=33,
                   blit=False,
                   repeat=True)
Writer = writers['ffmpeg']
writer = Writer(fps=30, metadata=dict(artist='LikeGeeks'), bitrate=1800)
anim.save('3d_plot_animation_with_point.mp4', writer=writer)
Output:
https://drive.google.com/file/d/1JcRNNDBQyvfZEZzgNQUmuB-QkbgAyN3d/view
This animation not only rotates the surface but also includes a red point that moves in a flower-like pattern.
Audio integration
Synchronize audio with visual elements
To synchronize audio with your animation, you can use libraries like PyDub for audio processing and MoviePy for combining audio and video.
First, install the required libraries:
pip install pydub moviepy
Then, you can create a simple audio track and combine it with your video:
from pydub import AudioSegment
from pydub.generators import Sine
from moviepy.editor import VideoFileClip, AudioFileClip, CompositeVideoClip
audio = Sine(440).to_audio_segment(duration=4000)  # 4 seconds of 440 Hz tone
audio.export("audio.wav", format="wav")
video = VideoFileClip("3d_plot_animation_with_point.mp4")
audio = AudioFileClip("audio.wav")
final_clip = video.set_audio(audio)
final_clip.write_videofile("3d_plot_with_audio.mp4")
This code generates a simple 4-second audio tone and combines it with your previously created video.
Add voiceovers or explanatory narration
To add voiceovers or narration, you can record an audio file and use a similar process to combine it with your video:
from moviepy.editor import VideoFileClip, AudioFileClip, CompositeVideoClip
video = VideoFileClip("3d_plot_animation_with_point.mp4")
narration = AudioFileClip("narration.mp3")
final_clip = video.set_audio(narration)
final_clip.write_videofile("3d_plot_with_narration.mp4")
Dynamic sound based on plot characteristics
You can create dynamic sound based on plot characteristics by generating audio that changes with the plot’s features.
Here’s a simple example that changes the pitch of a tone based on the z-value of the moving point:
import numpy as np
from pydub import AudioSegment
from pydub.generators import Sine
from moviepy.editor import VideoFileClip, AudioFileClip, CompositeVideoClip

# Generate dynamic audio based on z values
z_values = np.sin(np.linspace(0, 2*np.pi, 120))  # 120 frames
base_freq = 440  # A4 note
audio_segments = []
for z in z_values:
    freq = base_freq * (1 + z)  # Adjust frequency based on z
    segment = Sine(freq).to_audio_segment(duration=33)  # 33ms per frame
    audio_segments.append(segment)
full_audio = sum(audio_segments)
full_audio.export("dynamic_audio.wav", format="wav")
video = VideoFileClip("3d_plot_animation_with_point.mp4")
audio = AudioFileClip("dynamic_audio.wav")
final_clip = video.set_audio(audio)
final_clip.write_videofile("3d_plot_with_dynamic_audio.mp4")
This code generates a tone that changes pitch based on the z-value of each frame corresponding to the animation’s movement.
Mokhtar is the founder of LikeGeeks.com. He is a seasoned technologist and accomplished author, with expertise in Linux system administration and Python development. Since 2010, Mokhtar has built an impressive career, transitioning from system administration to Python development in 2015. His work spans large corporations to freelance clients around the globe. Alongside his technical work, Mokhtar has authored some insightful books in his field. Known for his innovative solutions, meticulous attention to detail, and high-quality work, Mokhtar continually seeks new challenges within the dynamic field of technology.