Secure Linux Server Using Hardening Best Practices
In the previous post, we talked about some Linux security tricks, and as I said, we can’t cover everything about Linux hardening in one post, but we are exploring some tricks to secure Linux server instead of searching for ready Linux hardening scripts to do the job without understanding what’s going on. However, the checklist is so long, so let’s get started.
Disable Ctrl-Alt-Delete
This is important if you are not securing your server physically.
If you are using Systems before CentOS 7, all you have to do is to comment out the following line in
/etc/inittab
file.
ca::ctrlaltdel:/sbin/shutdown -t3 -r now
Otherwise, if you are using CentOS 7, use the following command:
$ ln -s /dev/null /etc/systemd/system/ctrl-alt-del.target
Secure mounted Filesystems
Each of your Linux file systems is mounted so you can use the files inside it. You can mount your file systems using different options.
You can type these options in the /etc/fstab file.
LABEL=/ / ext4 defaults 1 1
The first column is just a label for your device.
The second column is the location of the mounted filesystem.
The third column is the file system type, like ext4.
The fourth column contains security options, which are the most important ones for us.
The last two columns control the options for the dump and fsck commands.
Mount options
You can control the mont of the file systems using the following options:
| auto | Mount automatically at boot time. |
| noauto | Don’t mount automatically at boot time. |
| exec | You can execute binaries on this file system. |
| noexec | You can’t execute binaries on this file system. |
| suid | You can run files with setuid bits. |
| nosuid | No setuid bits. |
| user | non-root users can mount this device. |
| nouser | No user except root can mount this device. |
| owner | Only the owner can mount the device. |
| ro | Mount device read-only. |
| rw | Mount device read-write. |
| defaults | Make your file system’s options: rw, suid, exec, auto, nouser. |
The exec and noexec options enable you to control the binary execution, whether to enable it or disable it.
You can mount /home securely with noexec like this:
/dev/hda1 /home ext4 noexec 0 2
Keep in mind that this line will prevent the execution of binaries on /home, so if you have any executables, you should take care of that.
You can mount /tmp with noexec option as a step of hardening, but keep in mind that some programs might not work properly because they use /tmp to execute. So you can test your software with this mount option; if it goes well, then it’s OK.
If you have binaries that have the setuid and setgid bits, and you set the nosuid option, the setuid and setgid bits will be neglected.
Only root users can mount file systems, but if you want other users to do that, you can set the user, nouser options. If you set the user option, then any user can mount or unmount file systems.
You shouldn’t allow any user other than root to mount file systems.
By setting ro and rw options, you can set your filesystem as read-only or writable.
You can mount any file system as read-only like this:
/dev/hda2 /usr ext4 ro,nodev 0 2
Like mounting /boot as read-only using the same way, but keep in mind that if any kernel update arrives, you have to remount it as rw to apply the update like this:
$ mount -o remount,rw /boot
You should be wise enough to make the decision about which directory needs which option to mount with.
Protect /etc/services file
The /etc/services file translates service names to port numbers.
This file is writable by root only, but you may make a mistake without intention.
Well, you can use the immutable attribute to avoid any mistakes.
Also, that prevents accidental deleting or overwriting of such a vital file.
$ chattr +i /etc/services
Remove unused accounts
If you take a look at the accounts on your system, you will notice many unused accounts. These vendor accounts that come with your system for some Linux system activity.
If you don’t need those accounts, you can remove them using the userdel command:
$ userdel adm

$ userdel games

$ userdel halt

$ userdel lp

$ userdel shutdown
Also, you will need to remove the groups belongs to those accounts if they exist using groupdel command.
If you check /etc/passwd file, you’ll see that the users don’t exist anymore.
Hardening cron scripts
Some scripts under /etc/cron.d doesn’t have the secured permissions. They are readable to normal users.
Consider fixing the permission for the scripts that are responsible for executing the scheduled job on our server so root only can read it.
$ chmod 0700 /etc/cron.daily/*
Normal users don’t need to look at those scripts.
Keep in mind that if you update a program that provides a cron file on your system, consider updating the permission, or you can make a shell script that does the job for you instead.
And the same for the other cron directories like:
/etc/cron.weekly

/etc cron.monthly/

/etc cron.hourly/
Securing SUID programs
SUID (Set User ID) is a special type of file permissions you can give to a file. When you want to use a tool like passwd command, which writes on files that belong to root such as /etc/passwd and /etc/shadow, the passwd command must have this SUID permission to enable normal users to use that command.
You may take a look at all programs that have this permission and consider removing that permission from unnecessary programs that you think that normal users won’t need it.
$ find / -type f -user root -perm -4000 -print
All these programs have SUID bit, and normal users can run them as root. To remove that permission, you can use this command:
$ chmod a-s /bin/mount
Keep in mind that some programs need that permission to work, so be careful when doing that.
Risky world-writable files and directories
World-writable directories and files can lead to serious problems if the attacker gains access to them.
He will be allowed to modify or delete any file, and this is a serious problem.
To get all writable files in your web folder, use this command:
$ find /home/*/public_html -type f -writable -exec ls -la {} \;
And writable directories:
$ find /home/*/public_html -type d -writable -exec ls -ld {} \;
You may find writable directories and files in some locations like /var/mail, which has no problem, but on web folders, you have to be careful about that much.
You can use some integrity check tool like tripwire.
This tool will scan the system for any public writable files and directors and warn you, so you can take action about them.
Risky symlinks
Symlinks or symbolic links are useful if they used for a good purpose to simplify your work, but the attacker in some cases uses any scripting language on your server to build a symlink to travel between directories and see your files, steal passwords and gain access to all websites on the server, so it’s very important to keep an eye on that.
The following command searches for any symlink and deletes it.
$ find -L /home/*/public_html -type l –delete
You can change the path based on your server paths. You may also create a shell script to find those symlinks and send them to your email so you can investigate how it was created.
#!/bin/bash

find /home/*/public_html/ -type l >> /root/symlinks

cat /root/symlinks | cut -d"/" -f3 | uniq >> /root/out

echo "Symlinks:"|mail -s "Symlinks in $(hostname)" user@domain.com < /root/out > /root/symlinks > /root/out
There are many ways to stop symlink creation. If you are using PHP, you can disable some serious functions, and apply Symlinks only if owner matches for your server if you are using apache.
This trick is very useful, especially when dealing with compromised systems.
There is a lot to talk about securing PHP; maybe we should make another post about that, but let’s keep simple for now.
Securing log files
Your last line of defense is the log files. Log files for each running service tell you everything about that service, so you can keep track of everything that happened on your system.
In worst scenarios (like gaining root access), the attacker might delete those log files and left you without any evidence of what had happened.
Consider copying your log files to a different place or schedule a regular backup of log files to somewhere else that shouldn’t be accessible to the attacker if he gains access to your system.
Securing Linux resources
Securing Linux Resources is a must because users can jeopardize the stability of your server if they left to use server resources without limits.
You can allocate how much memory for each user, how many processes, and other server resources.
Under /etc/security, the limits.conf file allows you to specify the limits for your users like this:
* hard   rss      500000

* hard   nproc    50
The first line says for all users, limit the memory usage to 500 MB.
The second line says for all users, limit the number of processes to 50 processes.
All these restriction rules applied to all users except the root user.
The asterisk on both lines means all users, and some systems have users running services like www or MySQL users, and all users on the system are using these service users, and if we apply our restriction rules for them too, that can lead to problems.
A good solution for this problem is to add a special group and add our users to that group and apply our restriction rules to that group.
In this case, only those users will have this restriction.
@myusers          hard       rss          500000

@myusers          hard       nproc        50
Hardening /proc directory
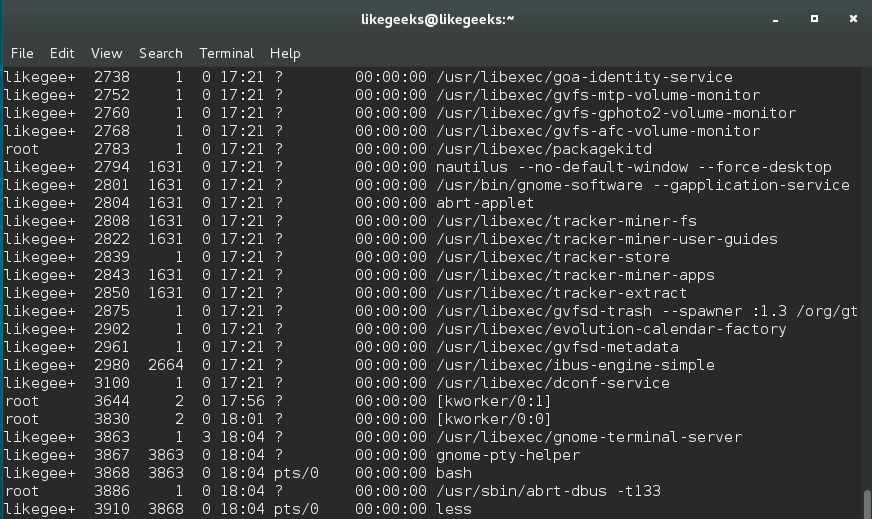
The /proc directory or as they call it (process information pseudo-file system) gives you hints about the currently running processes. By default, Linux allows normal users to see that information. You can see what processes belong to root and all other user’s processes.
Before you use this trick, as you can see that normal user can see all processes, even root processes:
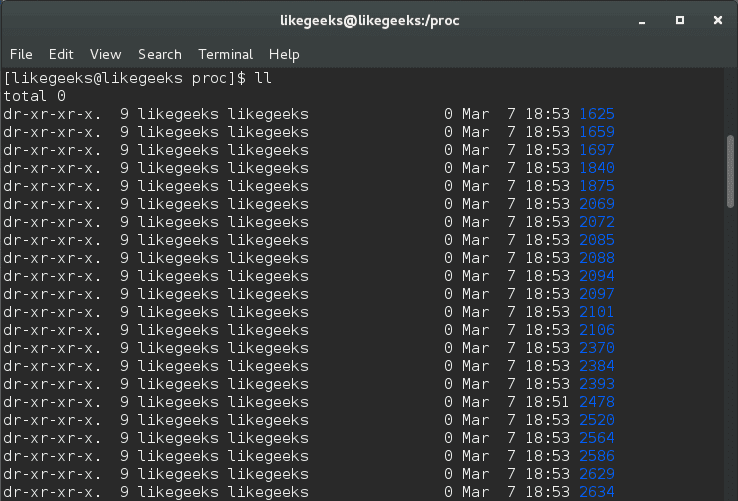
The hidepid mount option allows you to hide process IDs. It takes a value of 0, 1, 2.
$ mount -o remount,rw,hidepid=2 /proc
And you can write it to /etc/fstab to make it permanent so after reboot, the process IDs remain hidden.
proc /proc proc defaults,hidepid=2 0 0
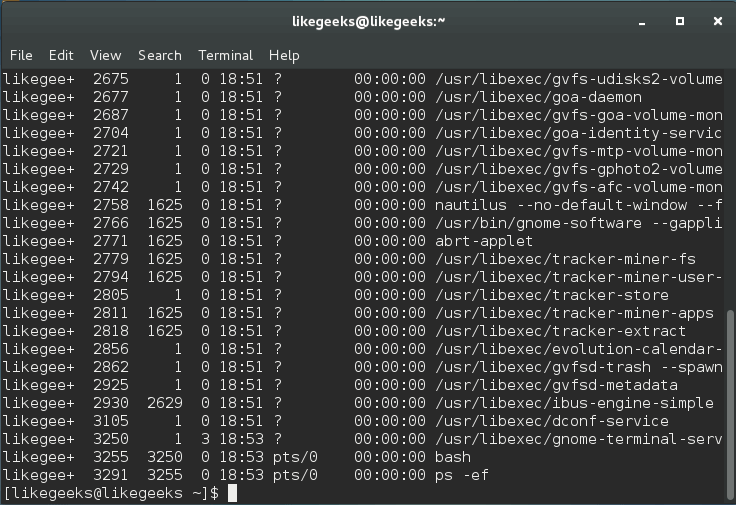
After that command, you will see your processes only. Only root users can see all processes for all users.
$ ps -ef
Another mount option is gid, which allows users in a specific group to see /proc directory.
If the group you want to assign permission to has an ID of 100, you can write it like this:
$ mount -o remount,rw,gid=100 /proc
Also, you can write it in /etc/fstab file:
proc /proc proc defaults,gid=100 0 0
The last advice for you is to keep your system and software always updated, which will protect you from many threats.
I hope you find these hardening tricks useful. Keep coming back.
Thank you.
Mokhtar is the founder of LikeGeeks.com. He is a seasoned technologist and accomplished author, with expertise in Linux system administration and Python development. Since 2010, Mokhtar has built an impressive career, transitioning from system administration to Python development in 2015. His work spans large corporations to freelance clients around the globe. Alongside his technical work, Mokhtar has authored some insightful books in his field. Known for his innovative solutions, meticulous attention to detail, and high-quality work, Mokhtar continually seeks new challenges within the dynamic field of technology.
That find command is way too complicated. This will suffice: find / -type f -perm +6000 -ls
… the + prefix on the permissions (octal) causes find to evaluate as true if *any* of the bits are set for a given file. (The more usual – prefix requires that *all* of the bits be set). Since permission 4000 (SUID) and 2000 (SGID) can be combined to a single octal value of 6000 we can use +6000 here.
There are numerous other issues with these tips. In general it’s not useful to use the noexec mount option as there are a number of ways to force Linux to execute files (including compiled binaries) as arguments to command interpreters. noexec merely prevents Linux from honoring the execute bit, not from loading and executing the code in a file through the use of some other interpreter (debugger or other such utility). There are options to disable the honoring of SUID/SGID bits which could more useful. But you still only get marginal benefit from employing them. Sometimes SUID/SGID programs *are* useful (usually when they are NOT root owned nor root-group associated).
Symlinks are not particularly risky. It’s the permissions on the target which determine access and as for symlinks from under a directory tree that’s being exposed by a web server … most web servers are configured to use a “chroot” system call to lock their serving processes into a directory tree. Symlinks can’t cross chroot boundaries and are treated as dangling if they do so.
The /etc/services file is not particularly sensitive and I would consider *many* other files as much higher priority for protection with the chattr immutable attribute (your kernels, init and shell binaries, ps and related utilities … pretty much everything your system depends on to boot and every executable that’s trusted by root and/or SUID root and trusted by users on the system.
Also disabling Ctrl-Alt-Del is only marginally useful for systems being exposed as “kiosks” or student terminals or similar situations where the hardware power switches, reset switches, power cables and such are all secure and yet the console is exposed. It’s basically useless for servers and for desktop systems where the user can power cycle the system without the operating system’s co-operation.
Thank for your comment.
I said SUID/SGID programs *are* useful and you should take care of that, so you may not notice it.
Symlinks are too dangerous if you’ve ever run a server before that uses Cpanel which is reconfigured not to use chroot at all.
The /etc/services file was a sample of the files that need to be secured, the idea is the immutable attribute and I discussed how to secure the kernel binaries but you didn’t notice it also.